live_tv
Livestream Starting Soon
00
Hours
:
00
Minutes
:
00
Seconds
Up next in 10

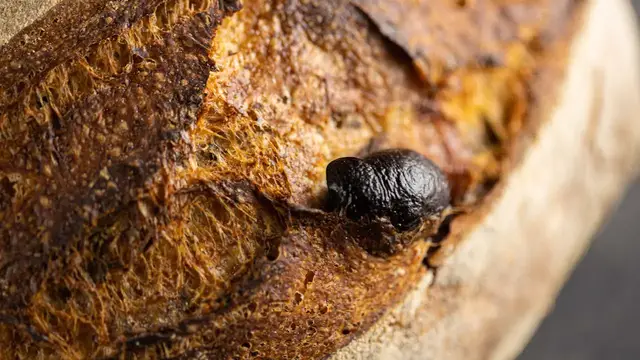
Learn a delicious sourdough olive bread recipe. It's not hard to do and it's the best recipe olive bread that can be found.
The article: https://fdgk.net/sourdough-olive-bread-recipe
Buy Foodgeek merchandise: https://fdgk.net/buy-merch
Ad links!
Bench Scraper: https://fdgk.net/buy-bench-scraper
Lodge Combo Cooker: https://fdgk.net/buy-combo-cooker
Baker's Lame: https://fdgk.net/buy-lame
Walnut Lame: https://fdgk.net/buy-walnut-lame
Buy razor blades: https://fdgk.net/buy-razor-blades
Buy cake turntable: https://fdgk.net/buy-cake-turntable
Jars for your starter: https://fdgk.net/buy-weck-jars
Small spatula for starter: https://fdgk.net/buy-small-spatula
Bowl: https://fdgk.net/buy-bowl
Baking Steel: https://fdgk.net/buy-baking-steel
Proofing Baskets: https://fdgk.net/buy-proofing-baskets
Flour shaker: https://fdgk.net/buy-flour-shaker
Show More Show Less View Video Transcript
0:00
Today I'm going to show you how to make a Mediterranean-inspired sourdough olive bread
0:04
It's freaking delicious. Hi, I'm Sune, and I'm a food geek
0:18
Today I'm going to show you how to make a sourdough bread with juicy olives, spiced with herbs that grow in the countries around the Mediterranean Sea
0:25
If you already bake sourdough bread, the method itself is probably pretty well known to you
0:31
What makes this bread a little bit more of a challenge is having whole olives in the dough
0:37
They seem to just pop out all the time when you're shaping, making the shaping process more difficult than the normal sourdough bread
0:45
But like anything else, people who bake sourdough bread embrace challenges, learn the techniques, and know how to power through and get things done
0:55
Ain't it true? If you're new to this channel, I bake a lot of sourdough bread and I make delicious food from all over the world
1:03
I'm on a quest to get the most out of every ingredient, and my goal is to teach you how to do that in simple and understandable steps
1:11
So join me by subscribing and ringing the bell so you won't miss any future videos
1:16
The herbs that we'll be using to flavor the bread are basil, oregano, rosemary, and thyme
1:23
They'll pair perfectly with the large juicy catamaran olives that we'll be using in this bread
1:29
Well, enough chit-chat. Let's get started with the recipe. The written recipe, the ingredients, and the amounts are linked in the card above
1:38
In the morning, we'll start by mixing them in the pan. Add 60 grams of mature sourdough starter to a glass
1:46
Then 60 grams of whole grain wheat flour. 60 grams of brat flour
1:53
and 120 grams of water. Mix it well, so it's completely combined
2:00
Put an elastic band around the container so you can monitor the growth
2:07
Then it's time to auto-lease. Mix 704 grams of bread flour, 159 grams of whole grain wheat flour
2:17
and 566 grams of water. At this point, I should have also been adding the spices
2:28
which would have made them completely be distributed through the bread, but I didn't, and you'll see later what that does
2:36
Mix everything together so that the flour is completely hydrated. Cover with a damp dish towel and leave until the lavand has peaked mine can grow to triple the size but you know your own starter
2:55
then when the lavand has peaked mix 50 grams of water with 21 grams of salt
3:11
Pour 250 grams of the granule of all the yeast flour
3:26
And add the water. Then it's time to combine the water and the starter into the dough
3:32
This can take from 5 to 10 minutes. going until you feel like it's properly dispersed
3:47
Cover it with a damp dish towel and leave it to rest for 30 minutes
3:52
Then when the 30 minutes are up, we start the bulk fermentation and we'll do three sets
3:57
of stretch and folds. The first stretch and fold. The second stretch and fold
4:21
Now during the second stretch and fold, we'll add the olives between each stretch and fold
4:34
Thank you
5:04
and the third string and we do a window paint test to see if the dough has has proper gluten development and as you can see it does
5:44
then we put it in a bulking container i like to use these plastic containers with clear sides
5:51
where i can mark where the dough is when i put it in and we leave it to grow about 50 to 60 percent
5:58
It takes, for my starter, about three to four hours at room temperature
6:03
Then when the dough has grown, it's time to divide and pre-shape the dough
6:08
Pour the dough out onto your unfloured kitchen counter and divide it using a bench scraper
6:13
I usually weigh the dough, but you don't have to. We're going to work some strength into the surface of the dough
6:22
Grab the bottom of the dough closest to you and stretch it up and fold it halfway in over the dough
6:27
Continue with the top and the left and the right side. It's kind of like an envelope
6:33
Then flip the dough over. Put the bench scraper behind the dough and pull it forward
6:37
so that the top of the dough gets pulled down in front of the dough
6:40
and then the top gets tighter. If an olive pops out, don't push it in
6:47
Just remove it completely or add it in the back of the dough. Just keep going until you have a reasonably taut surface
6:54
and then it's time to pre-shape the other piece of dough. Once you're done with that, leave it to rest for 20 minutes to relax the gluten
7:34
And then when the 20 minutes up, it's time to final shape the dough. Start by flouring two oval bannetons with rice flour
7:43
Add a little bit of flour to your kitchen counter. Flip the piece of dough onto the flour
7:51
Stretch it out into a rectangle. Stretch one side out and fold it in over the dough and repeat with the other side
8:01
Then roll the dough up tightly. It should end with the seam down towards the table
8:15
Seal the end by pulling the dough on the side down over the roll in the side
8:27
Put the shape wrap in an oval banneton with the seam upwards and put a plastic bag around it so
8:33
that the dough doesn't dry out. Then it's time for the final proof. I prefer to retard my dough so I
8:40
take the two bannetons and put in the fridge until the next day. Then when you're ready to bake, put a Dutch oven or kombi cooker in the oven
8:49
and heat your oven to 260 degrees Celsius, about 500 degrees Fahrenheit or gas mark 10
8:55
Let it heat for an hour. Then when the oven is hot, grab the bread out of the fridge
8:59
and place it onto a peel with a piece of parchment paper. Slash the bread and put directly into the oven
9:34
Bake with the lid on for 20 minutes and remove the lid and turn the oven down to 230 degrees Celsius
9:44
That's 450 degrees Fahrenheit or gas mark eight. Bake for another 25 minutes until the bread is crusty, crunchy and has a dark caramelized crust
9:56
Take the bread out of the oven and turn the oven back up to 260 degrees Celsius, 500 degrees Fahrenheit and bake the other bread
10:04
And that's how that looks
10:17
All right, let's cut this bread and see how it looks on the inside. Oh my God
10:29
So how about that bread? deliciously crispy with those gorgeous olives scattered throughout the crumb
10:36
Here in Denmark, it's winter and pretty cold, and I need anything that can remind me of the sun
10:41
This bread certainly helps me in the right direction. And while it's wonderful when it's
10:46
freshly baked, it's also delicious when toasted. I hope you learned something today. See you next time
#Food & Drink
#Cooking & Recipes