Up next in 10

Pro tips on how to shoot the best self-portraits while you're traveling solo!
Captured in Paris, France! Shop for portrait presets on FilterGrade: https://filtergrade.com/product-category/lightroom-presets/portrait/
Want to capture amazing self portraits while traveling? In this video, Matt and Sam from the FilterGrade team share creative ways to shoot self portraits on your own—no additional photographers required. Take better pictures during your solo travels!!
Filmed in Paris, France, we’ll walk you through easy setups, camera tricks, and creative angles to help you take better travel photos anywhere in the world.
SEE ALSO --- Shooting Portrait Photography in Paris With Sam Burke https://www.youtube.com/watch?v=nMZxIdChX4M&pp=0gcJCfsJAYcqIYzv
Whether you’re exploring a new city, hiking outdoors, or just want to level up your solo shots, these tips will make your travel photos stand out.
What you’ll learn:
- How to set up your camera or iPhone for solo shooting
- Creative framing and background ideas
- Tips for using tripods, timers, and even just a smartphone
- Ways to make your self portraits look natural
- Tricks for getting pro-level shots while traveling alone
- Random and fun poses/ideas to test (like using a mirror with your self portraits)
Show More Show Less View Video Transcript
0:00
Hey guys, we're back with another video.
0:02
Today we're in Paris, so I want to show
0:04
you five different ways you can take
0:06
self-portraits while traveling if you
0:08
don't have a lot of equipment. Let's get
0:09
started. I shoot self-portraiture
0:11
because sometimes the photographers I
0:13
know can't translate the idea that I'm
0:15
thinking of as the same way I could, or
0:18
the model friends I know are busy, or I
0:20
do it because I don't have gear, I'm
0:22
traveling, or I'm just trying to get
0:24
back to my roots of photography and
0:26
become better as both a photographer and
0:28
a model. For the first self-portrait, I
0:30
want to take it in front of this window,
0:32
but I don't have a tripod for this one.
0:34
So, I'm going to use my camera on a
0:35
selftimer. We have this shelf here. So,
0:38
I think that the best height angle I
0:40
could get would be using this. When
0:43
you're setting up the camera settings,
0:45
you want to aim it towards where you're
0:48
going to shoot it. So, I'm going to use
0:50
this shelf here.
0:52
A good way I like to make sure it's
0:54
focused on me if I want to use a lower
0:58
aperture is kind of set something
1:02
if I'm sitting about right here. I'll
1:04
move this to here and then I'll make
1:06
sure my focus is on the flowers. So
1:09
going over to the camera.
1:11
I'm focusing on the flowers.
1:17
I'm just going to take a test shot to
1:19
see if I like the settings.
1:22
For this one, because it's so backlit, I
1:24
kind of like the silhouette look, and I
1:26
think my settings are perfect.
1:29
I'm shooting at 100, one over 100 for
1:32
the shutter speed. My f-stop is 2.8, and
1:36
my ISO is 100. So, it keeps it very
1:39
dreamy and low.
1:42
So, I'm setting up for selftimer here.
1:47
Now, for most selftimers, you have like
1:48
8 to 10 seconds. So, it's enough time
1:50
for me to move the object and kind of
1:53
sit where I want to.
1:58
For self-portrait, it's a lot of moving
2:00
back and forth. So, I'm going to look to
2:02
see if I like that photo.
2:06
It's a little bit higher than I want it
2:08
to go. So, because I have this handy
2:10
dandy shelf, I'm going to lower it.
2:16
Make sure I haven't touched the focus,
2:18
so it should still be right now. Let's
2:21
try that again.
2:28
[Music]
2:34
I think it looks great. I think the
2:36
focus is perfect, but I think it's a
2:38
little bit dark. So, I'm going to use
2:40
this lamp here. So, I don't want this
2:42
lamp in the photo, obviously, but I just
2:44
want it to illuminate my face. So, as
2:47
much as these flowers are beautiful, I
2:48
might move them
2:52
and just aiming it to where I think my
2:54
face will be. And now my frame is about
2:56
right here, so I know that this lamp
2:59
will be out of it, but it'll give me
3:01
just enough light to be able to see me
3:03
as the subject.
3:08
The light looks great, though. Let's try
3:10
one other location. maybe
3:14
this chair on the couch cuz it's just
3:16
enough height. And obviously because no
3:19
one's making sure your camera is safe,
3:21
you want to make sure it's Don't do it
3:23
on anything too risky. I have faith in
3:25
this, so I'm going to leave it here.
3:27
Same thing. I think I'm going to stay by
3:30
the window. So, I'm going to put an
3:31
object to focus on. This is really
3:34
important for self-portraits. If you
3:35
want to use a small a short f-stop, make
3:38
sure that it's in focus.
3:42
We'll try again.
3:54
Looks great. You can't see a lot of the
3:55
scenery, but there are good portraits of
3:57
yourself. For the next one, let's try it
4:00
outside with a tripod. Now, if you're
4:04
able to store this in your luggage, this
4:06
is a great tripod. this jobies tripod.
4:08
It can attach to fences or any
4:10
surroundings and if you're shooting by
4:12
yourself and you just want to prop it up
4:14
on something short high, this is a great
4:17
tool to have.
4:21
So, now that we're outside and we have
4:23
this tripod,
4:26
this can attach to things, but it I
4:28
don't necessarily want it sitting on the
4:30
ground, especially as a tourist. You
4:31
have to be smart about it. Um, so let's
4:34
go to the park up the street
4:37
and we can attach it to the fence there
4:39
and take some selfportraits in the grass
4:42
while we walk. I'm just going to adjust
4:43
my camera settings so that I'm ready to
4:45
go once we're there. So, I'm going to
4:48
wrap the tripod
4:51
around this fence here.
4:55
Make sure it's nice and tight. This is
4:58
great. An onthe-go tripod.
5:01
Turn my camera on.
5:03
Make sure we're on selftimer.
5:06
And same as last time, to make sure you
5:08
have the focal distance correct and you
5:10
don't have anyone around to focus on, I
5:12
just pick a spot on the ground. Like
5:15
over here, I'm looking at these leaves.
5:17
So, I'm going to pick a leaf on the
5:18
ground and I'm going to focus my camera
5:21
on that. Remember, this is while you're
5:23
traveling and while you're alone.
5:26
So, it's not as easy as just setting it
5:28
up on a tripod. as well as you have to
5:31
give yourself at least three shots of,
5:33
"Oh, that didn't look right. Oh, the
5:35
lighting was off. Oh, oh, I got to
5:37
adjust that." The first three shots are
5:38
all just to make sure you have it
5:40
perfect. With self-portraiture, I would
5:42
recommend like before you press the
5:45
selftimer to kind of have a pose in
5:46
mind. You can stand here while you're
5:48
thinking and be like, "Oh, maybe this
5:49
time I'll do this." Cuz you will just be
5:51
wasting time of going back and forth
5:53
between the camera. I think I'd feel
5:55
awkward looking at myself standing. And
5:57
that's okay. So, I think I'm going to
5:59
move to a more seated position um to
6:02
kind of give a more natural I didn't
6:03
just press the selftimer look. You want
6:06
them to look like someone else took the
6:08
photos
6:10
and that you
6:12
have more hands than you do.
6:15
So, I'm going to sit for this one.
6:20
And remember, you are the photographer
6:22
and the model. So, you have to give
6:24
yourself grace in both aspects. I liked
6:26
my pose on that one, but because I
6:28
changed it and didn't adjust adjust my
6:29
focus, that picture was out of focus.
6:33
And that means I just need to readjust
6:36
some things. I also because there's
6:39
garbage cans in the background, you can
6:42
throw away an idea. I don't love this
6:44
one as much. So, I'm going to change.
6:47
I'm going to tilt it up. Make sure I'm
6:49
focused on that grass
6:52
because I focused on the grass. I'm a
6:55
little bit out of focus because
6:56
obviously the width of my body is
6:58
changing in focal. So, I wouldn't
7:01
recommend shooting on as low of an
7:03
f-stop as I am. I'm going to move up to
7:07
like 5.6
7:09
so that I give myself a little bit more
7:11
leeway with the focus.
7:15
I've been taking self-portraiture for a
7:17
long time now. And I will say the moving
7:19
back and forth.
7:21
It never gets easier, but you do find
7:24
ways to
7:26
make it faster after a while. You get
7:29
settings that you like, but with the
7:31
light changing, it's always a different
7:33
story. I started doing self-portraiture
7:35
a couple years ago as a photographer
7:38
that gets her best ideas or her most
7:42
exciting ideas to herself at late hours
7:45
or when I'm solo traveling, it's kind of
7:48
hard to rely on other people. So, being
7:52
able to do both the modeling and the
7:53
photography, you can get your ideas out
7:55
a lot faster. You can get your ideas out
7:58
um without the mediation of other
8:01
people. And as much as I do love
8:03
photographing, sometimes you you got to
8:06
get it out right now. And it's the
8:08
quickest way that I've gotten ideas out.
8:10
Another tip I use when I'm doing
8:12
self-portraiture if I know I'm going to
8:13
be sitting kind of nearby is I'll stick
8:16
my hand out
8:18
and I'll focus on my hand. Now, because
8:21
I might not know exactly where my hand
8:25
is in front of me, I'll drop my hand
8:27
down on the ground and kind of make a
8:31
marker. I can put leaves. If you're
8:33
inside, you can mark it with a pen. Just
8:35
kind of straight up
8:38
in focus.
8:40
So, when I turn that on,
8:43
also
8:44
finding your frame. So, if this is the
8:47
top of the frame and I'm looking, my
8:48
hand just enters the frame. I know that
8:51
over here the top of my frame is very
8:53
low. So, I have to be doing some pretty
8:56
low portraits. Looking at the
8:58
surroundings though, I will say the
9:00
buildings back here are really nice. So,
9:02
you can always change your idea and not
9:05
having a model. You don't have to feel
9:06
very guilty about it. I'm going to tilt
9:08
it so I get some of these surrounding
9:10
buildings. Same thing. Hand in front.
9:14
Focus on my hand.
9:19
Hands in focus. Now mark straight down
9:22
where my hand is. I'm gonna put some
9:24
leaves there. Find my top of my frame.
9:27
Top of my frame's right here.
9:31
Is a little dark. Nothing I can't fix in
9:34
editing, but it includes the buildings.
9:37
I'm in focus and
9:41
I didn't need anybody else. For the next
9:43
self-portraits, we're going to do if you
9:46
don't have a tripod, if you don't have a
9:48
camera and you're only using your
9:50
iPhone. So, using my iPhone, I have the
9:54
iPhone 14. The camera on this one, I
9:58
will say, is just below what Apple is
10:00
now doing, but it's still great. There's
10:05
a few settings that you can change on
10:08
your phone before you get started, which
10:11
is my first tip is that the camera
10:14
that's on the back of your phone is a
10:16
lot better than what the front camera
10:18
is. So, I feel like we're not taking a
10:20
selfie. We're not using this front
10:23
camera here because this camera is not
10:25
going to do you justice. So, use your
10:27
back camera
10:29
and turn it on. So when your self timer
10:31
is on,
10:33
choose 10 seconds. It'll do a burst.
10:37
Now for this, you can change kind of the
10:40
white balance.
10:42
This is a great tool where you're
10:44
adjusting filters so that it saves you
10:46
in the editing room. I want to take kind
10:48
of a warmer one since it is fall. Maybe
10:52
change. Make sure my boot looks nice and
10:55
brown.
10:57
Nice, rich, warm. All right.
11:01
Now, you don't have to worry about
11:03
what's in focus for an iPhone, which is
11:05
really nice. You just have to worry
11:06
about where you're putting it. So,
11:08
looking around where I can put my camera
11:11
on.
11:14
Oh, I like this gazebo. It's got a good
11:18
architecture to it. I'm trying to think
11:20
of where we can set up our phone.
11:24
Maybe right here. Make sure my timer is
11:27
on. I prefer 10 seconds. I think
11:30
anything less than that is doing
11:32
yourself a disservice.
11:46
Now, there is still people in the
11:47
background, and that is part of the hard
11:50
thing about doing portraiture in a city.
11:53
And I'm trying to think of a good way
11:54
that we can avoid it. Like maybe
11:57
shooting a little bit closer. If we shot
12:00
this way,
12:09
check your work.
12:11
We've now successfully kind of avoided a
12:13
lot of the people,
12:15
but I don't love that photo. So, let's
12:17
try it one more time. Before we try it,
12:20
I'm gonna sit and I'm gonna think about
12:21
what I want this photo to look like.
12:24
I think that standing is good because
12:28
iPhones shoot very tall
12:31
obviously for shooting horizont or
12:33
vertically. So I think you can also just
12:36
play with them where I can sit in it and
12:40
see if I feel awkward. That one feels
12:42
awkward. This one feels awkward. So,
12:44
maybe I do something a little bit more.
12:54
Let's try that.
13:08
You can always crop. And I like
13:11
this image.
13:13
I like the way the iPhone one looks, but
13:15
I think we could try one more with the
13:17
camera, not having to set it up
13:18
anywhere. I think we could do it either
13:21
holding it like this, cuz if you have
13:23
the tripod, you can kind of give
13:24
yourself a bit more length. If not, you
13:27
can always hold your camera like this.
13:29
But it's all about just making sure
13:30
you're in focus and making sure the
13:31
lighting's good. Come on.
13:38
So, because we have to refocus on
13:40
ourselves and we are doing it handheld
13:42
such as this, you have to kind of guess
13:45
where your arm length is because I can
13:48
only see this much of my screen. I can
13:51
see my jacket and I can see that right
13:53
now it's in focus. So, I can't extend my
13:56
arm any more than this. So, I'm going to
13:59
keep my arm just raise it up until I'm
14:00
in frame.
14:03
Make sure my selftime is on.
14:06
Check that focus one more time and then
14:09
raise it up till I'm in frame.
14:12
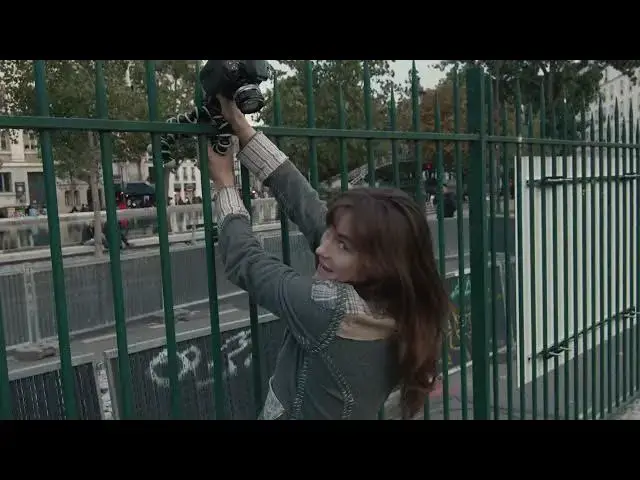
For portraits like this, it's best with
14:14
a wide angle lens because I'm currently
14:16
using a 35. So everything I take within
14:19
arms reach is very close. So when you're
14:22
doing self-portraiture, any wide angle
14:24
lens will give you a lot more
14:25
forgiveness in what you're doing.
14:29
But being able to use, if you don't have
14:31
a tripod, just your arms width, making
14:34
sure you're far away and kind of keeping
14:36
it like this.
14:43
When you're solo traveling specifically
14:45
and you don't have any other people
14:47
around you to take these photos, it's a
14:49
great tool to use. And any photo that
14:52
you've seen today, any style that you've
14:54
seen today is how I've taken all of my
14:56
self-portraits throughout my career. And
14:59
at the end of the day, don't get
15:00
discouraged. Not every photo you take is
15:02
going to be an absolute beauty. But it's
15:06
a great way to take photos alone and
15:08
when you're traveling that you might
15:10
take a museum worthy photo on your own,
15:13
or you might spend a day learning how to
15:15
take better photos, and both are
15:17
amazing.
15:19
So, the apartment I'm staying in in
15:20
Paris only has one mirror, and I don't
15:23
really love the lighting and the
15:24
ambiance in this bathroom. So lucky for
15:27
me, this one is removable. So another
15:29
portrait you can do if you don't have a
15:32
lot of equipment is shoot with a mirror
15:34
cuz that way you can always see what
15:36
you're looking at.
15:38
[Music]
15:44
I think using the light, the natural
15:46
light that we have coming from this side
15:49
and maybe these flowers here, we can
15:52
prop up this mirror.
15:55
The safest way to do it is on this side.
16:02
Okay.
16:09
So, looking at this mirror, I can see
16:11
everything that's in my frame. My light,
16:16
artificial light here. So, it's kind of
16:18
got a warm look. I have You've got to
16:22
use the stuff around you. I've got one
16:24
cap that'll bring this a little bit
16:28
higher.
16:30
So this way you don't have to find an
16:32
object to focus on. You can focus on
16:34
yourself in the mirror right here.
16:40
Perfect. And with that selftimer still
16:42
on,
16:50
find an angle that we like.
17:00
and ready to go.
17:10
You can also incorporate the camera with
17:13
it. This one you don't really have to be
17:15
on selftimer obviously, but you can
17:18
incorporate the camera to kind of make a
17:20
nice frame.
17:25
Try it again. So you can incorporate the
17:27
frame to kind of frame your photo for
17:29
you.
17:31
Maybe let's take
17:37
two more.
17:43
All right,
17:48
perfect.
#Photographic & Digital Arts
#Travel Guides & Travelogues