Up next in 10

Learn how to shoot 16mm from cinematographer Matthew Moloney in New York City. In this video he'll go over the basics of getting started with 16mm, loading your camera, filming techniques, and more.
1. Getting Your First 16mm Camera
2. Getting Your 16mm Film
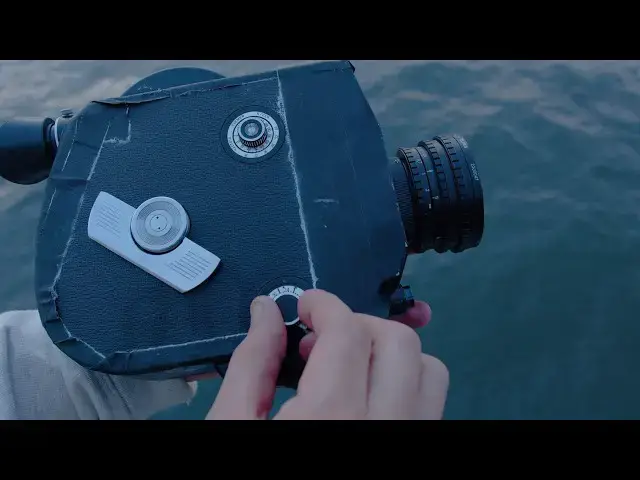
3. Learning How to Use Your 16mm Camera
4. Shooting with Your 16mm Camera
5. Getting Your 16mm Film Processed and Scanned
Watch Matthew's earlier video about his initial experiences shooting with 16mm film here: https://youtu.be/NmqUcKnQXYg
Watch our 16mm film playlist here: https://www.youtube.com/playlist?list=PLke4AY7yuKm8GVTr3NU0sXVXqN0M4KpBP
I got my 16mm camera from Maksim with k3super16: https://www.instagram.com/k3super16/
Featuring Matthew Moloney!
Matthew Moloney Instagram: https://www.instagram.com/moloneymatthew_/
Matthew Moloney: https://matthewmoloney.com
Watch all Matthew Moloney short films: https://www.youtube.com/@mattmoloney_/videos
Shot by Moloney Creative Agency: https://moloneycreativeagency.com/
Show More Show Less View Video Transcript
0:00
[Music]
0:22
all
0:33
all right what's up everybody it's Matt
0:35
here again from Filter grade and today
0:36
I'm going to be going over how to shoot
0:39
16 mm film with the K3 or the kror 3 I
0:43
have a video about this from a couple
0:46
years ago now but I rewatched it and I
0:48
wasn't really um too keen on it I don't
0:51
think I had actually shot that much
0:53
footage before I had made that video it
0:57
was more of like hey check out this test
0:58
roll type of thing but now now that I've
1:00
been shooting for a couple years I want
1:01
to show you how to do it first off
1:05
because I think a lot of people are
1:06
super intimidated by it and they think
1:07
it's like a super expensive um the just
1:11
really scary and like almost like
1:13
impossible but just watch this if you're
1:16
interested in learning about film or if
1:18
you've never shot film before or really
1:21
yeah if you're just trying to get
1:22
started and see what it's all about cuz
1:24
for me that was where I was at when I
1:26
first started and yeah I watched a
1:28
couple of videos and I was like oh wow I
1:30
could do this too so this is me telling
1:32
you you can easily Do It um just follow
1:35
these steps and you'll figure out how to
1:38
so let's get
1:40
[Music]
1:48
started the first thing that you're
1:49
going to need to do is actually you know
1:51
get your hands on a camera whether
1:53
you're renting or buying um that is up
1:57
to you you can find them on eBay you can
1:59
find people that sell on Instagram you
2:00
can probably find them on some random
2:02
Niche Facebook Niche marketplaces you
2:04
can find them all over the place I got
2:06
the kenor 3 because it seemed the most
2:09
similar to the Super Eight cameras that
2:12
I was shooting before that were more
2:13
like um you know handheld like trigger
2:16
cameras like this so that's what I was
2:18
looking for I know a lot of people go
2:20
for BX cameras um and there's tons of
2:23
others just look on eBay I can link them
2:27
Link in the description for um Max K3
2:31
camera he's this guy in Russia that
2:33
restores and refurbishes and builds
2:35
these cameras to be kind of like
2:37
modernized and all different types of
2:39
variations and stuff he's a super great
2:41
guy that's where I got this from and
2:43
it's been good for me for the past four
2:45
or five years so you can find them from
2:48
him I think he also has a page on eBay
2:50
or there's other people that you can buy
2:52
from on eBay which I'll kind of like
2:54
flash through so you can see what that
2:56
looks like there's some that are super
2:57
expensive there's some that are a little
2:59
bit more affordable um and then some of
3:02
them will come with a lens others you'll
3:04
have to buy the lens separately For Me
3:07
Mine originally came with a like the
3:10
standard lens that this had on was like
3:12
a 17 to 70 mm lens or something um so
3:16
you can really use it for like
3:17
everything I really enjoyed that and
3:20
then I started shooting a little bit of
3:21
more music videos and things like that
3:23
with it so I needed something that was a
3:25
little bit wider so now I have this um
3:30
I think it's like a 14 mm
3:33
lens it's a bomo fisheye lens so maybe 8
3:38
mm I don't even know but it goes all the
3:40
way down to 3.5 and it does the job
3:42
really well so the first yeah the first
3:44
step is just going to be finding
3:45
yourself a camera I highly recommend the
3:47
Kor 3 it is really great and it's also
3:50
good for beginners that don't really get
3:52
film all that too well so the next step
3:55
once you actually have the camera itself
3:59
is to find some film so today I have
4:02
Kodak 500t this is a Tungsten speed or a
4:06
Tungsten film which means it's balanced
4:08
to tungsten light not daylight there's
4:11
all different types of film from 250d to
4:15
100d 500t I think they might make 500d I
4:18
don't know but there's a few different
4:20
variations I'll link them all in the
4:21
description you can also kind of just
4:23
search for like 16 mm film at B&H or
4:27
online on Amazon or anywhere else you
4:29
might be looking for it and it'll kind
4:31
of show you the different types the
4:33
number is just like the iso so 250d
4:36
would be 250 daylight Balan film um 500t
4:40
is 500 ISO tungsten balance they also
4:43
have black and white film and I'm sure
4:46
they if you look hard enough they
4:47
probably have some like special effects
4:49
Red film or or things like that um but
4:53
yeah my camera right now has 250d in it
4:55
and I also have a pack of 500t which I
4:58
don't know that I'll be shooting cuz
4:59
we're outside right now but yeah that's
5:01
the next step is finding actually like
5:03
what you're going to be
5:05
shooting all right so the next step is
5:07
actually going to be loading your camera
5:09
so this is going to be a little bit
5:10
different depending on what camera
5:12
you're actually using for the K3 it's
5:15
relatively simple I've only loaded a few
5:17
other 16 mm cameras they all kind of
5:20
have a similar mechanism um and system
5:24
so it's not too too difficult it just
5:26
takes some practice and you're going to
5:28
want to practice maybe using old film uh
5:32
just to make sure you know how to you
5:34
know wind it all correctly and and get
5:36
it on the spools this was something I
5:38
definitely struggled with at first I
5:41
even remember there was a couple times
5:43
when I was on set using the camera that
5:46
I actually reached out to Max on
5:47
Instagram because I couldn't get it to
5:50
be 100%
5:51
perfect I remember one time it was like
5:55
uh midnight I was in Boston and it was
5:58
midnight here I'm not even sure what
5:59
what time it was for him but he
6:02
immediately responded to my question on
6:04
Instagram and then even called me back
6:06
like right away so that was really nice
6:09
he helped me load the camera perfectly
6:11
and get it all set up and whatnot even
6:14
with the language barrier so that was
6:16
super convenient and if you have any
6:19
questions or need to figure out exactly
6:21
how to load the K3 check out our other
6:23
video on that and that'll go more in
6:26
depth on how to actually load the camera
6:29
just like any other camera you're going
6:31
to want to get to know it before you
6:32
actually start using it so let's go
6:34
ahead and just look at some of the
6:35
different knobs and dials that you're
6:38
going to need to know before you
6:40
actually start shooting with it the
6:42
first obviously on the lens you're going
6:43
to see your aperture and you're going to
6:45
see your focus ring um that's pretty
6:49
standard next up you're going to see the
6:51
frames per second dial on here you can
6:54
shoot anywhere
6:56
from you know stop motion like one frame
6:58
per second at a time
7:01
to 60 frames per second and I haven't
7:04
really done too many experiments using
7:06
you know 60 frames slow motion footage
7:09
with this camera but I have shot in 24
7:12
frames per second 18 and even 12 if I
7:15
want to get sped up footage or or
7:18
something similar to that nature so
7:20
that's always a fun way to experiment
7:22
normally I'm just setting it to
7:24
24 and the next is going to be the
7:28
actual crank knob this this is what's
7:29
going to kind of wind up your camera to
7:32
shoot there's no battery in this camera
7:34
so the more you wind the more footage
7:37
you're actually able to shoot if you
7:38
only wind one or two turns you're only
7:41
going to get a little bit something else
7:43
to consider when shooting with this
7:46
camera is the exposure settings um
7:50
there's no light meter built in so
7:52
you're going to kind of have to think
7:54
about your exposure and get to know it a
7:56
little bit more it's not as easy as just
7:58
shooting with a digital camera camera
8:00
seeing what looks nice seeing what
8:01
doesn't look nice so for me I use a
8:05
light meter app it's free I found it on
8:07
the App Store it wasn't too much
8:09
research done you can go ahead and buy
8:11
you know an expensive light meter if you
8:13
want to that's fine for me I just always
8:16
have my phone in my pocket so I figured
8:18
I would use this and it's really easy to
8:19
use I just open up the app once it's
8:23
ready to go um I set the shutter speed
8:27
to 160th of a second that's what my
8:30
camera is automatically set to if the
8:33
frames per second is at 24 frames per
8:35
second right now I have 500 speed film
8:40
in so I'm going to set the iso to 500
8:42
and then point it at my desired frame
8:45
and whatever it tells me to set the
8:47
aperture to that's what will be an even
8:49
light setting obviously you have some
8:51
leeway on either side if you want it to
8:53
be a bit darker you can expose for that
8:55
if you want to be a little bit lighter
8:57
you can also expose for that so just
8:58
keep that in mind mind when you're
9:02
shooting okay so you just finished your
9:04
roll now the last step is just going to
9:07
be to get it processed which at first I
9:10
had no idea how where like I had no idea
9:14
about any of that and didn't really
9:16
understand it so I remember when I was
9:18
younger I looked on Reddit like how do I
9:21
get my film developed or where do I get
9:23
my film developed and things like that
9:25
um when I lived in Boston it was a
9:28
little bit trickier cuz there weren't
9:29
really any labs in the city I used to
9:31
ship my film out to cine lab which is in
9:34
a different part of Massachusetts or to
9:37
Color Lab which is in Maryland highly
9:39
recommend Color Lab they were really
9:41
good and they were always pretty quick
9:42
about the turnaround times which was
9:45
something I used to get really annoyed
9:47
about um when having to ship it in the
9:49
mail but that's a story for another day
9:52
so for me now I live in New York so I go
9:56
to negative land um they process super
9:59
great 16 mm film probably like 35 mm
10:04
Motion Picture film they they uh they
10:07
develop and process a lot of Motion
10:09
Picture film they're really good at it
10:11
and it's actually really nice being able
10:14
to go in person and talk to them a
10:17
little bit about you know what you might
10:19
want with your footage or with your film
10:21
and whatnot so it's really cool to go in
10:24
like see it in person um so if you're in
10:27
New York I highly recommend going to
10:28
negative land if you're not in New York
10:30
I still recommend shipping your film to
10:32
negative land cuz they have really good
10:33
pricing and they get the job done really
10:36
well um so yeah so the main thing is
10:40
that once you get your film out of the
10:42
camera you're going to want to keep it
10:44
in the original canister that you had
10:46
the film come in the reason being is
10:48
because these are light light proof
10:51
containers um that are sealed at all the
10:53
edges and whatnot so don't risk exposing
10:57
your film by storing it and like
11:00
some paper wrapped some like you know
11:03
just do it properly store it in one of
11:05
the boxes that you got your film in and
11:07
it'll just make your life a whole lot
11:09
easier um but yeah really besides the
11:12
developing and scanning um there's not
11:16
too much else to it I think something to
11:18
think about a little bit down the road
11:20
maybe once you have your roles ready to
11:22
develop are what format you're going to
11:24
want them in um and how you're going to
11:27
want them put on your computer I guess I
11:30
know a lot of labs you can either ship a
11:33
hard drive or bring the hard drive to
11:34
them or you can upload that you can have
11:38
the lab upload them to Google Drive or
11:39
Dropbox or have them we transfer it
11:42
sometimes that costs money because some
11:44
of the file sizes can be a bit larger
11:46
depending on how you're scanning your
11:47
film um normally for personal projects I
11:52
will scan in either 2K or 4K and for
11:57
most of my like work projects those ones
11:59
I'll scan in 4k just to have higher
12:01
quality and most of the time I'm
12:03
shooting digitally in 4k so it kind of
12:05
just matches up
12:06
easier um and then there's a few other
12:09
things to think about like what format
12:11
you want them I usually go for Apple Pro
12:14
res format if you have a Windows
12:16
computer you might want something
12:17
different some Labs don't really even
12:19
give you that option they just send it
12:21
off um and then something else to think
12:24
about is if you want the actual film
12:26
gate um On the Border or if you don't
12:29
want that I know a lot of people don't
12:31
really like it other people think it's
12:33
the coolest thing
12:35
ever I'll let you make that decision but
12:38
that's another thing to think about and
12:40
yeah besides that the developing and
12:42
scanning portion isn't all that much
12:45
effort I guess it just costs money and
12:47
it takes a little bit of time but on
12:49
your end you should be fine so if you
12:51
have any questions make sure you talk to
12:53
the people at your lab they should be
12:55
happy to help but yeah other than that I
12:58
hope you enjoyed this video if you have
13:00
any questions about shooting film
13:02
developing editing if you have any
13:05
questions feel free to leave them in the
13:06
comment or reach out to me on Instagram
13:09
um I'm always more than happy to help
13:11
but yeah I hope you guys enjoy your day
13:13
hope you enjoyed the video and peace out
13:15
have a good one
13:17
[Music]
13:29
[Music]
#Online Media
#Online Video