Up next in 10


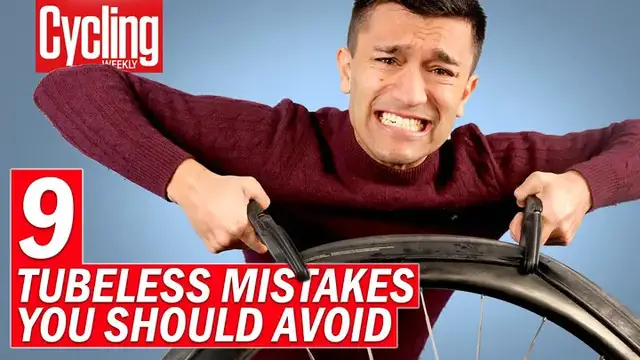
Setting tubeless up on road bikes can be a tricky process and there are a lot of mistakes that can be made. However, Sam Gupta has taken his years of experience as a mechanic to share all his knowledge on how to successfully set up a tubeless system on your road bike. Starting at the very beginning, all of these top tips for setting up tubeless will mean that hopefully you can get it done right first time round.
Show More Show Less View Video Transcript
0:00
I'll be honest, ever since tubeless tech made its way onto road bikes, I was never a fan. It felt
0:05
like the same products that were being used in the mountain bike world were just being repackaged
0:10
and marketed to road bike users. The issue being that the requirements of the two different
0:15
disciplines are actually pretty different. During my time working as a mechanic, I also saw all the
0:21
problems that the technology was causing people, from simply trying to get it set up in the first
0:25
place to blowouts to then punctures that just wouldn't seal. In fairness being a mechanic does
0:32
mean you're always left to pick up the pieces and maybe not seeing all the times that the technology
0:37
is actually working so this may have pushed my bias further into the extreme. As reluctant as I
0:43
was I have now ridden a fair few bikes with tubeless setup so I'm going to pair that experience with
0:49
all the time that I spent setting up other people's tubeless systems to let you know everything that I
0:55
wish I knew at the very start. I'm going to start at the very top because before anyone gets anywhere
1:05
close to leaving their inner tubes at home we need to make sure that we've sourced all of the correct
1:10
components. We have actually made an entire video comparing some of the most popular sealants on the
1:15
market so you can go and give that a watch to work out which sealant you would want to use
1:20
In this instance though, I'm going to be using this, the Stans sealant. I've also got some pretty
1:25
standard valves and I'll be using these Paneracer Agilist TLR tires. And then for the wheels
1:32
we have got the Hologram R45 wheels from Cannondale. Luckily, these wheels are actually
1:38
tubeless ready because they have the tape pre-installed. Now, one of the key things that
1:44
you don't want to get wrong at the very start is actually your tire selection. Even though you can
1:48
set up tubeless with narrower tyres, I would always opt for something that's kind of 28c
1:54
as a minimum. As we know from the gravel and mountain biking world, tubeless works best at
2:00
lower pressures. And I'm sure there's a whole bunch of you that have been running tubeless
2:03
setups on 25c tyres and you maybe haven't had any issues, but I would potentially put this down more
2:10
to luck than anything else If you want to make sure that you giving your sealant the best chance possible at doing its job then go wide on your tyres so that you can run a lower pressure
2:26
It's pretty well known that tubeless tyres can be a complete nightmare to get onto your rims
2:32
It can almost leave you feeling like you'll never be able to stretch them on
2:36
You can end up with blood blisters, sore hands, and not to mention just feeling incredibly
2:41
demoralized. But there are a few things that you can do to make life a little easier when it comes
2:47
to getting them onto that rim for the very first time. Before you try and actually get them onto
2:52
the rim, what I would say is place your new tires somewhere warm overnight. Ideally, maybe next to a
2:59
radiator as that is going to help the rubber become more malleable. Then if you have an older set of
3:05
wheels, try fitting the tires to these first with an inner tube and stretch them out a bit. Now
3:11
of course, sometimes older wheels, which aren't made for tubeless setups can be a little easier
3:16
to mount tires to, but this can be a little bit hit and miss. So don't worry if it doesn't work
3:21
out. If however, you can get the tires on again, I would say leave them inflated with that inner
3:27
tube again in a warm place. And it's just going to make those tires a little bit easier to manage
3:32
getting your tubeless wheels ready and prepared is absolutely crucial before you can even think
3:41
about trying to get them set up first make sure that they're incredibly clean you don't really
3:47
want any gunk left from any previous tubeless setups also check the rims for any dents or dings
3:53
which could hinder the ability for the tire to seat properly make sure that the rim tape is tight
3:59
and evenly covering the inside of the rim and make sure that your valve is inserted correctly
4:04
and it's right in the bed of the rim and potentially in the correct direction if it needs to be
4:11
Also, just make sure you utilize the little o-ring on the valve as well. You'd be amazed at how often
4:17
these little o-rings can actually make a huge difference to getting your tyre seated first time
4:22
If you're reusing valves, then pull the cores out and ensure that they're clean and they aren't
4:27
gunked up on the inside Once you got your wheels prepped then without getting any sealant involved try and mount the tyres As always be sure to utilise the deepest parts of the wheels
4:42
to ensure that you get the maximum amount of leverage and just slowly work it all the way
4:48
round. If you are able to get the tyres on from this point, then great, get them inflated and
4:54
see if you can get those tyres to pop into the bead. If you can't get the tyres onto the rim, then actually there are tools that can help you
5:05
Like one of these tyre grabbers. Now you can get these from places like Brand X, Lifeline or Challenge
5:11
They simultaneously hook onto the rim and grab the edge of the tyre. And then as you squeeze
5:17
it will then manoeuvre it into place. Now as you keep working it around, you should be able to get
5:23
it on. But don't be shy about putting a fair bit of force through one of these. They can absolutely
5:27
save your hands so much pain and actually they are built to take a fair bit of strain
5:37
If you've successfully completed a dry fit on your wheels and if your sealant is fairly runny
5:43
then you can remove the valve core and inject the sealant directly into the wheel and then simply
5:48
reinflate. However if your sealant is a bit too thick and would just coagulate inside the valve
5:54
then pop off a small section of the tyre, pour in the correct amount of sealant and then spin
5:59
the wheels by 180 degrees and then work the tyre back into place. There's always one part of the
6:08
tubeless setup process which always has my nerves on edge and that is when you start to introduce
6:13
air for the first time to get the tyre to seat. Just remember that the pop
6:18
is your friend and what I like to do to save myself from the dreaded tubeless explosion
6:26
is to get the tyre to pop into place using a compressor or track pump with a recharge facility
6:33
and then finish it off with a hand pump to fine-tune that pressure inside the tyre
6:42
This leads me really nicely onto my next point and that to make sure that you monitor the that is going into your tyres You may be very used to the amount of air you been filling your inner tubes with however tubeless tyres and hookless rims do have some pretty different requirements
6:59
A lot of tubeless tyres and hookless rims have a maximum pressure of around 70 psi
7:05
Of course, be sure not to exceed any maximum recommended pressure, but more importantly, make sure the pressure is right for your combined bike and rider weight
7:15
This is how you can start to reap the benefits of running a more comfortable, fast rolling tyre setup
7:21
Now, I like to use the SRAM calculator to help me work out what pressure I should be putting into my tyres
7:31
One of the things that I really started to hate about tubeless setups, especially during my time as a mechanic
7:37
was the issues caused when the system went wrong. And I must say that the time that my tubeless setup went wrong, well, it was a complete and utter nightmare
7:47
I had to fight with a tight-fitting sealant cover tire to drain out the remaining sealant to then try and fit an inner tube
7:54
which in reality was like trying to wrestle a wet fish into a small hole
7:59
However, the mistake that I made was that I wasn't carrying any bacon strips or plugs to fill the hole that the sealant couldn't deal with
8:06
I think that if I had some of those, then I probably could have sorted out the tyre fairly easily
8:11
So don't be like me. Make sure you're carrying the necessary tools to fix the basic problems
8:19
I won't lie to you. I'm still pretty sceptical about running tubeless on the road
8:24
For me, simply replacing or repairing an inner tube compared to wrestling with a tight-fitting
8:30
sealant-covered tyre when a puncture just won't seal is still my preferred option
8:35
However, I think if you ensure you carry the right tools with you, you fit tyres with a nice large volume and utilise quality sealant and also run the right pressure for your bike and rider weights, well, you might just be okay
8:49
Is there anything though that you wish you knew before you went tubeless? Let me know down in the comments below
8:55
If you enjoyed the video, then please do drop it a like, subscribe to the channel for more content and I'll see you again very soon
9:05
Thank you
#Bike Parts & Repair
#Sports
#Cycling
#Road Bikes