Up next in 10

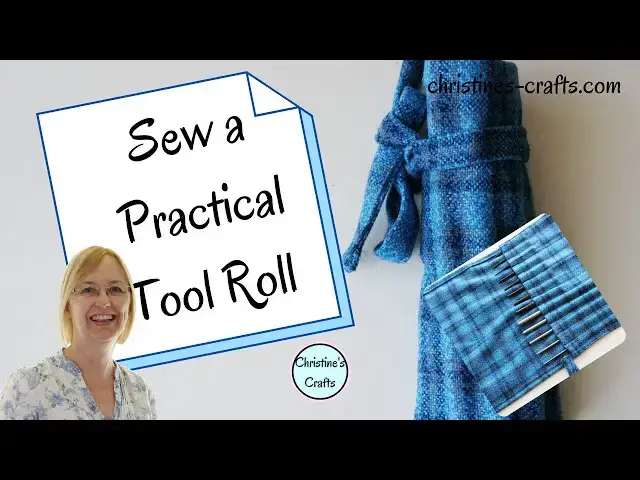
HOW TO SEW A TOOL ROLL - For Tools, Brushes, etc - Great Gift Idea for Men & Women
Jan 10, 2025

In this video I will show you how to make a tool roll for whatever you need. Great for nail art brushes, painting brushes, wrenches, spanners, punches, screwdrivers, etc. Store and transport your tools safely. Plus they are ready sorted when you want them.
Really quick and easy to make so get started on making yours today.
How about making one as a gift for someone special in your life? They make great practical gifts that people actually want.
If you enjoy crafting my blog is full of great ideas and tutorials. Plus if you subscribe you gain access to my free resource library, which includes a home crafts e-book, planners and much more, and get to hear about my latest projects first. Take a look at https://christines-crafts.com/
You can also find me across social media. To see all my information and ideas find me at https://linktr.ee/Christines_Crafts.
If you are thinking of opening an Etsy store then use this link and get off to a great start with 40 free listings https://etsy.me/32xoPdg
Show More Show Less View Video Transcript
0:00
hi and welcome to christinescrafts.com
0:02
today in this video i'm going to show
0:03
you how to make a tool roll
0:05
suitable for whatever tools you need to
0:07
keep safe and want handy and transport
0:09
around the place
0:10
this one's for punches but you can make
0:12
them for spanners
0:14
for artist brushes this is one i have
0:16
for some nail art brushes
0:17
you can see it's really faded where i've
0:18
kept it in the sun all my brushes are
0:21
perfect
0:21
inside so let's get started and see what
0:25
you need
0:26
i'm christine of christianscrafts.com
0:28
and this channel is dedicated
0:30
to crafting on a budget all you're going
0:32
to need to make your tool roll is some
0:34
fabric
0:35
now if it's for a workshop environment
0:37
you're going to want a thick fabric like
0:38
canvas
0:39
if you're just making it for some
0:41
brushes for your studio a nice cotton is
0:43
probably going to be more suitable
0:45
perhaps a fat quarter
0:47
how big a piece of fabric well that's
0:49
what i'm going to show you how to work
0:50
out how much you need
0:52
you need to get all the tools that you
0:54
want to put in your roll
0:56
and you need to lay them out on your
0:58
fabric
1:01
and think about how big you want your
1:04
tool roll to be
1:05
so you can see i'm looking there and
1:06
thinking about how big i want my pocket
1:08
to be
1:10
and i'm now going to grab all the small
1:12
punches that i also want to put in here
1:15
now obviously having long tools and
1:16
short tools is going to present with a
1:18
certain problem later on but i will
1:19
explain later in the video how you can
1:21
deal with all different length tools
1:24
so that'll be the pocket and then this
1:26
side
1:27
will cover over to keep everything
1:29
secure now obviously i have too much
1:31
fabric at the moment so i need to work
1:33
out how much to cut off
1:37
so the first thing i'm going to do is
1:39
work out
1:40
how wide my fabric needs to be for this
1:42
tool roll
1:44
so i'm going to work in inches and i'm
1:46
going to decide how wide each pocket
1:48
needs to be
1:50
now because i'm using punches i'm going
1:52
to do all my pockets the same width
1:54
and i think the largest one is going to
1:56
fit in a 1 inch pocket
1:58
if they were all that large i'd probably
1:59
go slightly bigger
2:01
and i've got 13 punches so my tool roll
2:05
needs to end up
2:06
13 inches wide
2:09
but i also need to consider i need a hem
2:12
all the way around it so i'm going to
2:13
add another
2:14
inch to either side so i'm actually
2:17
going to cut mine
2:17
15 inches wide the next thing you need
2:21
to think about
2:22
is how tall your piece of fabric needs
2:24
to be how long
2:25
so fold up your fabric and decide how
2:28
deep a pocket you would like
2:30
so that your tools stick out but they're
2:32
not sticking out so far they're going to
2:34
flop out and fall everywhere
2:37
so i think i'm going to go with six
2:38
inches which means i need to allow
2:41
seven inches of fabric because
2:44
i need to allow an inch for a hem that's
2:46
what you're allowing
2:47
all the way around and then i'm going to
2:50
see
2:51
when that fabric folds over onto the
2:53
longest tool
2:55
how much do i want that to overlap
2:59
measure down and make a decision
3:02
i think i'm going to go seven inches so
3:04
i'm going to allow eight inches more
3:07
and then you need to add those two
3:08
measurements to the height of the
3:10
tallest tool
3:11
so for me my piece of fabric is going to
3:13
end up 23 inches long
3:16
so once you've got those two
3:18
measurements you know how wide
3:20
and how long it's simply a case of
3:22
cutting them out
3:23
take your time to make sure you cut out
3:25
a good rectangle
3:27
so that it doesn't taper because i'm
3:29
working in checks it's very easy for me
3:32
you might need to do a bit more
3:33
measuring if you haven't got anything to
3:35
follow
3:36
so just cut it out and have a nice tidy
3:39
rectangle
3:41
and then the very first thing you need
3:43
to do is just check you're happy and
3:45
that you don't need to trim any off if
3:47
maybe you've been a little bit
3:49
generous if you've allowed too much
3:52
so that's what i'm doing i'm placing the
3:54
longest tool
3:55
looking whether it's going to be about
3:57
right once i've taken the hem off that
3:58
i think it is you can see what it's
4:01
going to be like it's just going to roll
4:02
along there
4:07
so think about this hem all the way
4:09
around that's the first thing you need
4:11
to do
4:12
so if you remember we decided an inch
4:16
would be the right amount for our hem so
4:19
from one side just measure one inch
4:23
and fold to the wrong side
4:27
and then double fold it so remember
4:30
you've still only used an inch
4:32
but your hem is going to end up looking
4:34
like it's half an inch because you've
4:36
folded it double
4:38
this means you have no raw edge showing
4:40
and you get a nice tidy edge that should
4:43
also
4:44
last a lot longer it's good and strong
4:48
so you're going to work your way all the
4:50
way along this side
4:52
now i haven't spread the film up because
4:53
i want to show you the corner because it
4:55
can get a little bit tricky at the
4:57
corners
4:58
now i've chosen to pin the two sides
5:01
and then overlap the end hems
5:05
it really doesn't matter but if you're
5:07
consistent you just
5:08
end up with a tidier job something that
5:10
looks a bit nicer at the end of the day
5:14
so now when i get to the corner i'm
5:16
going to turn
5:18
and i'm going to measure my inch down
5:19
from the end
5:23
and fold the hem at an inch down
5:27
now when you try and do your double hem
5:29
at the corner it's going to get
5:31
very tricky because you've got a double
5:33
hem from both sides so it's ending up
5:34
very thick so just persevere and take
5:38
your time and make sure it lines up
5:40
properly
5:41
and then secure it either with a clip or
5:43
with a pin
5:45
and then you can carry on
5:49
measuring your inch along the top and
5:51
pinning it in place
5:52
you'll see i'm you need pins and clips
5:54
just to show you it really doesn't
5:55
matter
5:57
and just keep going all the way around
5:59
you want your one inch hem
6:01
all the way around you want to make sure
6:03
each corner
6:04
is well done nice and tidy
6:09
and that you're consistent remember to
6:11
keep measuring especially if you haven't
6:13
got checks or stripes to follow
6:15
and then you won't end up with a wavy
6:17
edge to your tool roll
6:21
once you've got it all done all pinned
6:23
or clipped and you're happy
6:27
it's going to be time to take it to the
6:28
machine now
6:30
if you're a little bit nervous you can
6:31
always check it again
6:34
as you can see my pocket is going to be
6:35
perfect and the overlap is going to be
6:37
great it's going to keep everything
6:39
secure
6:41
and then it's over to the machine to sew
6:43
that hem in place
6:45
so just start down one of your edges it
6:47
doesn't matter which
6:49
and work your way down when you get to
6:51
the corner just take your time it's very
6:53
thick and some machines will cope better
6:55
than others
6:57
make sure once you get right to the
6:58
corner you secure
7:00
all the surfaces and then you pivot
7:03
so you simply keep the needle in lift
7:06
the foot
7:07
turn it through 90 degrees put the foot
7:08
back down and away you go again
7:11
and just keep going and repeat that at
7:14
every corner
7:16
and you should be getting a nice tidy
7:18
job you may notice i often tweak mine
7:20
i'm poking my fingers in making sure i'm
7:22
happy with it that's absolutely fine
7:25
now when you get round to where you
7:26
started make sure you overlap the
7:28
stitching
7:29
and do a little reverse so nothing comes
7:31
undone
7:33
so now you need to form a pocket for
7:36
your
7:36
tools to go in so get the longest tool
7:41
that you've got
7:43
place it onto your fabric and then fold
7:46
the fabric until you're happy with it so
7:49
you're going to get the pocket the
7:50
length you want so that your tool sticks
7:52
out
7:53
but it's not sticking out too far and
7:56
that the other end will overlap and keep
7:58
them secure
7:59
and then mark where you folded your
8:02
pocket
8:04
because you're going to fold along there
8:07
and
8:08
we're going to sew it in place now if
8:10
you've not got nice checks to follow
8:12
make sure you mark both ends
8:14
because you don't want to taper your
8:15
pocket
8:18
once you're happy you've got it nice and
8:20
straight
8:22
pin the pocket on both sides
8:25
because that's where we're going to sew
8:26
it in place to form like a bag
8:31
that is our tool roll so again make sure
8:34
you're nicely lined up
8:36
nice and straight and pin either end and
8:40
then it's time to make the little
8:41
pockets for the tools
8:43
now i'm going to use a sharpie so you
8:44
can see it and it's clear
8:46
but an air erasable pen is great for
8:48
doing this especially if it's something
8:50
delicate
8:51
it's okay using a sharpie or a tool roll
8:53
that's going to go out in the garage
8:54
with workshop tools in it air erasable
8:58
pen
8:59
means it will disappear so now it's time
9:01
to mark your pockets so go along your
9:03
pocket and for me that's marking
9:05
every one inch for you that may be
9:08
different sizes for different tools just
9:10
take your time and get them right
9:14
and just mark every single pocket
9:17
you want a good clear mark so you know
9:19
where you're going to sew
9:22
and then take your ruler to the folded
9:25
edge
9:26
and repeat those measurements now i'm
9:28
not going to do that because i've got my
9:30
checks that i can just run along
9:32
i can see whether i'm straight but it's
9:34
worth taking your time to make sure you
9:36
straight
9:38
and place the ruler on and draw in your
9:40
sewing line
9:43
so obviously on mine that sewing line is
9:45
now marked with a sharpie you're always
9:47
going to see that sharpie
9:49
if you've used an air erasable pen that
9:51
will disappear after you've sewn
9:55
once you've marked them all it may be
9:58
worth pinning the pocket down so that it
10:00
can't move about whilst you're sewing
10:03
and then we're going to sew either end
10:06
and then
10:06
every single pocket takes a little bit
10:09
of time
10:10
but it's very straightforward to do so
10:13
over to the machine
10:15
and sew one side remember to do a little
10:18
reverse at the beginning
10:20
and a little reverse at the end to make
10:22
sure nothing's going to come undone
10:26
and then instead of doing another pocket
10:28
swap to the other end
10:30
and sew the other side so that you form
10:32
the bag and it can't all just slide
10:34
across whilst you're sewing it
10:36
on each of its pockets
10:40
work your way to the bottom a little
10:42
reverse
10:43
and you've now made basically a little
10:45
bag a little pouch
10:49
and then one by one you're gonna sew
10:52
each pocket
10:53
so just set yourself up to sew down one
10:55
of the lines you made
10:57
when you get to the top a little
10:58
reversed keep it secure
11:01
cut off your threads move to the next
11:04
one
11:07
you can check your tools fit as you go
11:09
along or you can just keep going
11:13
and that's all there is to that part you
11:15
just keep going until you get to the
11:16
other end and you've done them all
11:18
i'm not going to show you all of mine
11:19
they'll just magically be done with the
11:21
joys of video
11:23
so now you need to turn your attention
11:26
to your
11:26
strap now if you're using ribbon or
11:28
webbing that's fine
11:30
but if you need to use the fabric you've
11:31
got you need to cut a long length
11:34
and fold it in half lengthways as you
11:37
can see i'm not only folding it i'm
11:38
pressing it
11:40
then open it out and then press one edge
11:44
to the center and do that all the way
11:47
along
11:49
now for mine i've used a piece of fabric
11:51
that's three inches wide
11:53
so that i end up with a strap that is
11:55
three-quarters of an inch wide
11:57
it's entirely up to you how wide you do
11:59
it and i generally to be honest use
12:01
webbing
12:02
or ribbon for my strap but i didn't have
12:05
any so i made some out of the matching
12:07
fabric
12:08
so once you've done that folding it on
12:10
one side you're going to repeat it to
12:11
the other side
12:13
and what this means is that when we fold
12:16
all these folds
12:17
we can trap all the raw edges in and
12:19
make a really nice tidy strap
12:22
and that's what we're going to do and
12:24
then pin or
12:25
clip it take it to the sewing machine
12:29
and sew along it now if you want a nice
12:31
tidy end you do need to just fold the
12:33
end of each
12:34
of the handling at each end to make it
12:38
all
12:38
tidy as ever a little bit of reverse at
12:41
the beginning
12:42
it is going to be very thick at the end
12:44
so be very careful
12:46
take your time if you want to you can do
12:49
a run of stitching along either side it
12:51
just makes it tidier for example if
12:52
you're doing bag handles
12:54
mine's going in a workshop so it's just
12:56
getting one run of stitches
12:59
and then once you've got your strap via
13:02
a ribbon
13:02
or one you've just made we're going to
13:05
attach
13:06
it to the tool roll now because my tools
13:09
are one set one length and one set
13:11
another i've got a little extra task
13:14
so if you've got a similar situation you
13:17
can just sew
13:18
the pockets closed on the ones that you
13:21
want to be shorter
13:23
so lay all your tools out and mark
13:26
which pockets you need to shorten and
13:28
where you're going to sew your seam
13:31
so then when i sew along there those
13:33
tools will still stick out they'll not
13:35
drop into the bottom of the pocket
13:37
and then whether you're doing that or
13:39
not you need to take your handle
13:41
fold it in half and where the fold is
13:45
we're going to attach it
13:47
to the roll so you're just going to take
13:50
it to one side
13:52
and you're going to sew it to the hem
13:55
now you can put it wherever you like so
13:58
i'm just going to clip it there and try
14:00
it
14:01
now when i fold the top over i think
14:04
that's too
14:05
near the end i want it further down
14:08
so play around until you're happy with
14:10
it i'm going to move mine down until
14:12
it's just at the top of the pocket
14:14
opening and i'm going to sew it there
14:19
now i haven't shown you in the video but
14:20
i hand sewed mine on because it was
14:22
so thick that i couldn't get it under
14:25
the machine
14:26
so make sure you securely attach that
14:29
strap
14:30
be it by hand or by machine and that's
14:33
it
14:33
you're all finished you can roll up your
14:35
tool roll
14:36
fasten it up and take them wherever you
14:38
like
14:39
and i did promise you i'd show you one
14:41
i'd made for some spanners
14:43
now forgive me because it came straight
14:45
out of the garage
14:46
and this has been here for years and
14:48
been well used
14:49
so you can see they're all different
14:52
lengths they're all different widths so
14:53
i so different with pockets
14:55
and i cut the end of the fabric at a
14:57
slope so that you could get
14:59
different length pockets as you went
15:01
across
15:02
so i hope you've enjoyed this video and
15:04
i hope you enjoy making yours please let
15:06
me know in the comments below what
15:07
you're making your tool roll for or who
15:09
it's for
15:11
and please give me a thumbs up if you've
15:12
enjoyed the video and subscribe to see
15:15
more
#Crafts
#Fiber & Textile Arts
#Fiber & Textile Arts
#Home Improvement
#Construction & Power Tools
#Art & Craft Supplies