0:00
Hey, if your Honda CRV threw an emission
0:03
system problem light, you're in the
0:04
right place. I'll walk you through the
0:06
fastest, surefire fix I use when the OBD
0:09
scanner points to an EVVAP issue. We're
0:11
going to be confident and practical. One
0:13
clear solution that actually works. No
0:16
guessing, no drama. First, what you'll
0:19
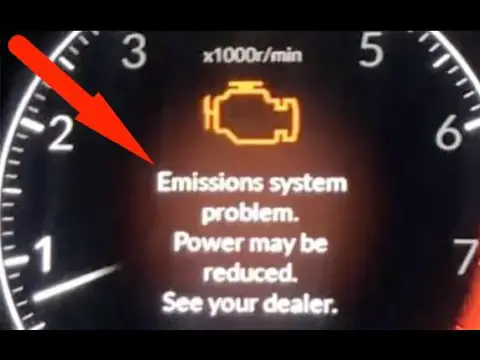
see and what it means. The dash might
0:22
show the check engine light and the
0:23
message emission system problem. or your
0:26
OBD scanner might spit out a code like
0:28
an EVVAP or purge related code. That
0:31
means the car's ECU module isn't getting
0:33
the right signals from the EVVAP system.
0:35
In plain English, fuel vapors aren't
0:38
being handled right. The most common
0:40
cause on the CRV is the EVVAP purge
0:42
valve. It either sticks open, sticks
0:45
closed, or leaks. The easy fix is
0:47
replacing that valve. Tools and parts
0:49
you'll need are simple. An OBD scanner
0:52
to read and clear codes. A basic socket
0:54
set. a flat screwdriver and the new
0:57
evvap purge valve for your model CRV.
1:00
The part usually runs about $50 to $70
1:03
and the swap takes about 20 to 40
1:05
minutes for most people. Step one, read
1:08
the code. Plug your OBD scanner into the
1:11
port under the dash. Turn the key to the
1:13
on position and read the trouble code.
1:15
If you see an evap code, you're on
1:17
track. If the code is something totally
1:19
different, don't ignore that. But for
1:21
evap codes, the purge valve is the main
1:25
Step two, quick sanity check. Before
1:27
tearing anything down, twist the gas cap
1:29
to make sure it's tight. A loose cap can
1:32
set the same codes. If the cap was
1:34
loose, tighten it. Clear the code with
1:36
the OBD scanner and drive for a short
1:38
test. If the light doesn't come back,
1:40
you're done. If the light comes back or
1:42
the code stayed, move on. Step three,
1:45
locate the purge valve. On most CRVS,
1:48
it's a small plastic canister with an
1:50
electrical connector and one or two
1:52
vacuum hoses mounted near the intake
1:54
manifold or charcoal canister. You'll
1:56
see the connector and the hoses right
1:58
away. Step four, test the valve the
2:01
quick way. With the engine off and cool,
2:03
disconnect the electrical connector and
2:05
pull off the vacuum hose. Try to blow
2:07
through the valve. If it's stuck open,
2:09
you'll feel air freely pass. If it's
2:11
stuck closed, you won't. Some valves
2:13
click when you plug them in with the key
2:15
on. You can listen for a tiny click when
2:17
the key is on but engine off. If it
2:19
doesn't act like it should, replace it.
2:21
If you're not comfortable doing the
2:23
apply voltage test, don't do it.
2:25
Replacement is cheap and fast. Step
2:28
five, swap the valve. Unplug the
2:31
electrical connector. Remove the
2:32
mounting bolt or clamp. Slide the hoses
2:35
off and pull the old valve out. Install
2:37
the new valve in the same orientation.
2:39
Push the hoses on firmly. Tighten the
2:41
bolt and reconnect the electrical plug.
2:44
Double check hose routing so nothing is
2:46
kinkedked or loose. Step six, clear the
2:49
code and confirm. Plug the OBD scanner
2:52
back in. Clear the trouble codes, then
2:54
start the car and let it idle for a
2:56
minute. Take it for a short drive. A 5
2:59
to 10 minute drive with varied throttle
3:01
is enough for the ECU module to run its
3:03
checks. If the light stays off and the
3:06
code doesn't return, the job's done. A
3:09
couple of extra tips so you don't come
3:11
back later. If the purge valve kept
3:13
failing repeatedly, inspect the vacuum
3:15
hoses and the charcoal canister for
3:16
damage or heavy soot. Replace any
3:21
Also, if your OBD scanner shows a
3:23
catalytic converter code or oxygen
3:25
sensor code after you fix the purge
3:27
valve, handle those separately. Don't
3:30
try to fix everything at once. If you
3:33
don't want to do it yourself, this is a
3:35
simple job for any independent shop and
3:37
should run about $50 to $90 in labor
3:39
plus the part. still usually cheaper
3:41
than letting the problem linger. To
3:43
recap confidently, read the code with
3:45
your OBD scanner, check the gas cap,
3:48
test, or just replace the evvap purge
3:50
valve, clear the code, and road test it.
3:53
90% of emission system problem messages
3:56
on the Honda CRV end up being the purge
3:58
valve or an easy evap leak. And
4:01
replacing the purge valve will get you
4:02
back on the road fast. All right, that's
4:05
it. If you want, drop your CRV year in
4:07
the code you read from the OBD scanner
4:09
in the comments, and I'll help you
4:10
confirm the part number.