Up next in 10

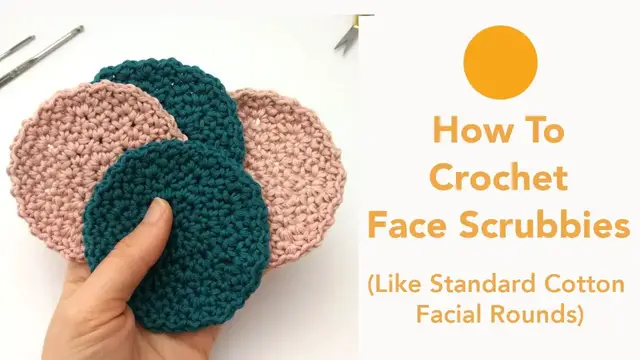
How to Crochet Face Scrubbies Like Standard Cotton Facial Rounds | Free Pattern
Jan 27, 2024

Learn how to crochet reusable, sustainable face scrubbies that are like standard cotton facial rounds.
#freecrochetpatterns #sustainableliving #ecofriendlycrafts #zerowasteliving
Measurements: 8.5cm diameter
A free written version of this pattern can be found on my blog: https://www.bygoldenberry.com/blog/crochet-face-scrubbies-free-pattern
The ad-free, downloadable and printable PDF pattern with detailed photos can be purchased here: https://www.bygoldenberry.com/shop/p/spider-face-scrubbies-crochet-pattern
What you'll need:
Yarn: 55 yards of sport weight yarn to make four face scrubbies (see suggestions below)
Hook: 3mm - Metric | 11 - UK & Canada | C-2 - US | 5/0 - Japan
Stitch Markers: 1 end of the round stitch marker and 14 other optional stitch markers
Darning needle
Scissors
* The Yarn I Used For This Project
Debbie Bliss Eco Baby Yarn - https://bit.ly/DebbieBlissEcoBaby
Show More Show Less View Video Transcript
0:00
Hey everyone, welcome to By Goldenberry, I'm Tina
0:03
If you want to make your own face scrubbies to clean your face and remove your makeup
0:08
in a more sustainable way, then you're in the right place. I'm going to show you how to make these really lovely, round, smooth, flexible face scrubbies
0:19
that resemble a normal cotton face pad. I make these for myself and I really love using them and I love knowing that I'm not
0:27
throwing something away every time I remove my makeup. So let's get to it
0:33
What you'll need to make these face scrubbies is some yarn. I'm using Debbie Bliss Eco Baby yarn, which is a sport weight, 100% organic cotton, which
0:44
is really soft and lovely for this project. You'll need about 55 yards to make four face scrubbies like this
0:51
I'll link the yarn in the description below. You'll need a 3mm crochet hook, a darning needle, a pair of scissors, and you'll need
1:05
a stitch marker to mark the last stitch of each round. This is optional, but you could use 14 other stitch markers to mark specific stitches in
1:18
each round. Make sure you choose a different colour for the end of the round marker so that you know
1:23
where to begin and where to end. Okay, let's get started. We're going to start by making a magic ring and then crocheting 8 single crochet stitches
1:35
into the magic ring. If you're not sure about how to work a magic ring, then head to my beginner crochet tutorials
1:43
and I go through it over there. So this is our magic ring
1:48
We're going to make 8 single crochets into the magic ring. So that's our first one, 2, 3, 4, 5, 6, 7, and 8
2:09
We're going to pull it closed and join the two ends with a slip stitch
2:19
So if we take the hook out, you should have 8 stitches and we're going to start counting
2:26
from here. So we have 1, 2, 3, 4, 5, 6, 7, 8, so we count the join that we just made
2:44
So grab your end of round stitch marker and mark this last join
2:54
Now we're going to start our first round and we're going to be using the spider stitch
2:58
which is a single crochet followed by a chain and then another single crochet
3:05
So we'll be making one of these spider stitches into each stitch around
3:11
So we'll begin our first one in the first stitch. So we start with a single crochet, chain 1, and then another single crochet into that
3:25
same first stitch. And this is where your other stitch markers come in
3:33
For the next round we'll be working into the chain 1s, so if you want to you can mark the
3:40
chain 1 with your other stitch markers so that you can keep track of where they are
3:46
because sometimes they get a bit lost. So we'll carry on like that, we'll do another spider stitch into the second chain of the round
3:59
So it's a single crochet followed by a chain and then another single crochet into that
4:07
same stitch. And again you can mark the chain 1 to keep track
4:21
But you don't have to do this, once you do a few of these spider stitches you'll get
4:26
the hang of where the chain 1 is. So I'm just going to take them out for now
4:32
So we'll carry on with our spider stitches into each chain around the circle
4:40
And meet me back here when you're at the end. I've come to the marked stitch and I'm just going to take it out
4:52
We need to make sure that we're working into this last stitch of the round that we mark
4:58
So we'll take that out and make another spider stitch into that stitch
5:15
And then we're going to put our marker back into the last chain 1 of the round
5:24
So this has now become our last stitch of the round. From this point on we'll be counting our chain 1s to make sure that we've got the right number
5:34
of stitches. So after that last round you should have 8 chain 1 stitches
5:40
So just make sure you've got the correct number before moving on to round 2
5:44
I've just marked all my chain 1s just to show you that I have 8 chain 1s all the way around
5:51
and to make it easier for the next round. At the end of the round we're not going to make a join or anything like that, we're kind
5:57
of working in a spiral of spider stitches. So we'll move on to round 2 and what we're going to be doing is we're going to make a
6:11
spider stitch into each of these chain 1s. So we can begin by taking out this marker and making our first spider stitch into where
6:28
that marker was. So again it's a single crochet, a chain 1 and another single crochet into that same stitch
6:51
Again you can carry on marking the chain 1s as you do them, but like I said, once you've
7:00
made a few rounds you'll get the hang of where the chain 1 is
7:14
So continue all the way around making a spider stitch into each of these chain 1s and I'll
7:20
meet you back here when we get to our last stitch marker
7:25
I've reached the last stitch marker and again I'm going to make sure that I'm working another
7:31
spider stitch into that last chain 1. So we'll make our final single crochet into there, chain 1, single crochet again and then
7:52
pick up our stitch marker and mark this last chain 1 of the round for round 2
8:01
We should still have 8 chain 1s so make sure you count the chain 1s to be sure that you've
8:08
got the right number of stitches for round 3. We're going to begin round 3 and we're going to be working a spider stitch into the first
8:19
single crochet of the spider stitch of the previous round and a spider stitch into the
8:26
chain 1 and then we'll leave the second single crochet unworked. So working a spider stitch into the first single crochet and the chain 1 of each spider
8:40
stitch from the second row. So let's begin, we'll start with our spider stitch into the first single crochet of the
8:51
previous round and then another spider stitch into that chain 1 and then we leave the last
9:19
single crochet of the spider stitch unworked. We move on to the next spider stitch, make a spider stitch into the first single crochet
9:40
and then a spider stitch into the chain 1 and leave the last single crochet unworked
10:00
and the same again. We just keep doing that all the way around until we reach this marker
10:08
I've reached the last spider stitch of round 2 with the marker in it and we're going to
10:14
make sure that we work into that last marker so we'll do a spider stitch into the single
10:20
crochet before the chain 1 that we marked and then remove the marker and spider stitch
10:43
into that last chain 1 that was marked and again mark that last chain 1
11:04
You should have 16 chain 1s after round 3 so make sure you've got the right number before
11:11
moving to round 4. For round 4 we're going to make a spider stitch into every chain 1 around the circle
11:21
so we're going to repeat round 2. Our first chain 1 is here so we'll start making our spider stitches, sometimes my tension
11:34
is a bit tight and I find it difficult to get into the chain 1s, if you're finding that
11:40
then make sure you work your chain 1s a bit looser than the rest of your crochet, it just
11:48
makes it a little bit easier to get in
12:04
So that's our first spider stitch, we'll move on to our second chain 1 and we just carry
12:14
on like this all the way around until we get to our marker again
12:21
Meet me back here when you're at the end. We're at the last chain 1 for round 4 and again I'm going to remove that stitch marker
12:30
and work another spider stitch into that marked chain 1 and mark that last chain 1 that I just made
12:59
We should still have 16 chain 1s for round 4 because we didn't increase
13:05
On round 5 we're going to be increasing a little so we're going to be working a spider
13:11
stitch into this first chain 1 of the first spider stitch and then we're going to move
13:17
to the next spider stitch and work a spider stitch into the first single crochet and the
13:24
chain 1. Repeat that all the way around, so we'll be doing a spider stitch into a chain 1, then
13:32
move to the next and do a spider stitch into the single crochet and the chain 1
13:38
So we'll begin and we'll do our spider stitch into the first chain 1
13:55
and then find the next spider stitch of the previous round and work a spider stitch into
14:01
the single crochet and then another spider stitch into that
14:15
chain 1
14:37
And then we move on to the next spider stitch and we'll work a spider stitch just into the
14:43
chain 1 and move to the next spider stitch and spider stitch into the single crochet
15:01
and the chain 1
15:25
Okay and repeat that all the way around again until you reach the marker
15:31
I've reached my marker and again I'm going to make the last spider stitch into that marked stitch
15:54
and mark the last chain 1
16:04
This is what it should look like and you should have 24 chain 1s for round 5
16:10
We're going to start round 6 and again it's just a repeat of round 2 which is a spider
16:16
stitch into each chain 1 all the way around. So we'll begin our first stitch here into the chain 1
16:32
I'm still making them a bit too tight
16:44
Find our next one which is here. Like I said, once you've made a few of these you'll get used to where the chain 1s are
16:54
and not need the stitch markers anymore. So continue like that all the way around and meet me back here when you've reached your
17:04
end of the round stitch marker. We're at the last stitch for round 6 and I'm just going to take this out again and do the
17:12
same that we've been doing this whole time and just make my last spider stitch into that
17:21
marked chain 1
17:32
And there we are, that's the end. So you should still have 24 chain 1s all the way around because we didn't increase on that
17:41
last round. And just to finish it off, to bring it round to a full circle, we're going to slip stitch
17:48
into the next chain 1. So find your next chain 1 and just do a slip stitch to join it together
17:59
Then the best way to finish these off is to do an invisible finish
18:03
So we're going to just cut the end of the yarn and we're going to pull this loop all
18:17
the way up until it comes out. Get our darning needle
18:31
We're going to find our last single crochet and weave our yarn under both loops of that
18:39
stitch and then back into the middle of the last stitch
18:50
There we go. And it looks like an invisible finish because you can't tell where it ends
19:02
So then just take this yarn and weave it in and out of your stitches however you like
19:09
through the back just to make sure that it's secure and it's not going to come out
19:22
I'm just doing a quick version here so obviously take your time and go in and out of various
19:31
stitches in various directions to make sure that it's not going to come loose
19:40
And then once you're happy with it, just snip the ends
19:51
And you would do the same with this, you would need to weave it in and out to make sure it's
19:56
secure and it's done. So that's how to make your own sustainable face scrubbies
20:03
If you have any questions for me, just pop them in the comments below. I'll do my best to answer all of them and I hope to see you next time
#Face & Body Care
#Make-Up & Cosmetics
#Unwanted Body & Facial Hair Removal
#Hobbies & Leisure
#Crafts
#Fiber & Textile Arts
#Clean Beauty
#Sun Care & Tanning Products