0:00
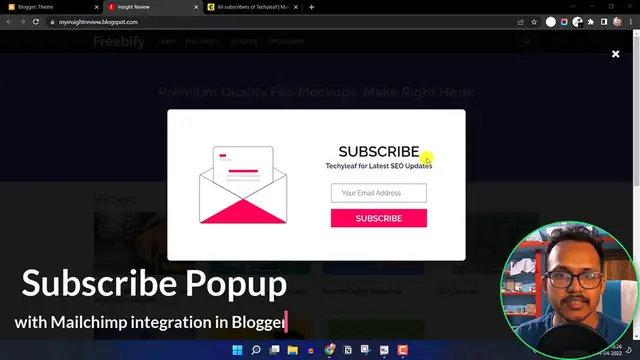
Hi everyone, welcome to Key to Blogging and in this video I will show you how you can add a subscribe
0:04
pop up button like this and integrate it with the MailChimp email marketing tool
0:10
So it is fully responsive so let me just click on Inspect Element and as you can see I have selected
0:16
the iPhone AC and this is how it looks in iPhone AC
0:20
So you can close this pop up by just clicking on this button and it will not show again
0:25
and this will save as the local storage in the device and
0:29
and it will not show again and again. So if you remove the cookies from the website, so let me just remove it and let me just refresh
0:41
this page. So let's wait for three seconds and as you can see the subscribe pop-up button is showing
0:49
And you can close this button by clicking on this button. So let's check how you can integrate the MailChimp subscribe pop-up button in your blogger website
0:59
So for this we need to go to the blogger dashboard and under the theme section we need to click
1:05
on the edit HTML but before that make sure to take a backup of your theme file
1:11
Now click on Edit Celal. Now you have to scroll down all the way to the bottom and search for the closing body tag
1:22
So I have given this link in the description so you need to copy the code from here to here So this is the whole code So I have given the link in the description So after the code you need to change the form action link
1:40
So this is the link of my MailChimp. So you need to generate this link and add it in your form
1:47
So let me just show you how you can do that. So you need to go to MailChimp and create a free account and after the after creating the
1:57
free account you need to click on the audience and here click on sign-off form
2:04
Now here you need to click on the embedded form, so just click on here and here you need
2:12
to click on the settings and here you can remove the CSS style as well and click on
2:20
continue and let me just copy this code in the notepad file
2:27
And here you will get this link, form action link. So just copy the link from here and just replace the link with your own MailChimp link
2:44
And after that you need to copy the whole code and paste it just above the closing body tag
2:51
So this is how the MailChimp subscribe pop-up button shows. So let me just remove the cookies again and let me just refresh this page and let wait for three seconds and as you can see the subscribe pop button is showing and you can also adjust the seconds so by default it is set to 3 seconds means
3:16
3,000 so you can if you want to change it to 5 second then change the 3,000 to 5,000
3:23
like this now let me just enter the email address from here and I will click on subscribe
3:32
And as you can see, it will show. So I have clicked two times
3:38
So that's why it is showing this email address at too many recent sign-ups
3:44
So let's go to the MailChimp and let's go to the audience and I will click on all contacts
3:56
And as you can see, the email address is already subscribed in our MailChimp list
4:01
So in this way you can integrate your MailChimp with your blogger website and collect emails from
4:06
your visitors. Now let me just enter another email from here so I will type my email address
4:13
And I will click on subscribe and it will show a message like thank you for subscribing
4:30
Now let me just go to the MailChimp and under the audience tab I will click on all contacts
4:35
and I will refresh this page And as you can see the new email address is already added in the subscribe list So this is how you can integrate your MailChimp account with your blogger website and collect
4:49
emails from your visitors. And you can also further adjust the form like you can change the
4:55
text. So let me just click on this subscribe here and here as you can see this is the H2 tag and
5:01
this is a paragraph tag. So you can change this text by just go to the
5:06
edit HTML section and here you will get the subscribe text and here you will get
5:15
the paragraph text and you can also increase the font size of H2 tech so if I
5:21
want to increase the font size then I can change the 35 to 40 like this and if I
5:29
want to increase the font size of paragraph then I can increase the font size from 60
5:36
16 pixel to 17 pixel like this. And you can get this code by just copy the code and here just type Control Plus
5:48
F and hit Enter and here you will see this option. So this is the font size 16 pixel so I can change it here from 16 to 17
5:59
So in this way you can further adjust the font size of the text and change the text
6:04
If you have any doubt regarding this then you can. can ask me in the comment section and if this content is helpful to you then make sure to hit
6:10
the like button and i will see you in the next video thank you