Up next in 10

What is Vegetative Propagation? - Cloning Plants Naturally and Artificially
Website: https://biologynotesonline.com/
Facebook: https://www.facebook.com/biologynotesonline
Instagram: https://www.instagram.com/biologynotesonline/?hl=en
Show More Show Less View Video Transcript
0:00
Vegetative propagation can occur through
0:02
both natural and artificial means. Let's
0:05
distinguish between natural and
0:07
artificial vegetative propagation.
0:11
Natural vegetative propagation occurs
0:13
without human intervention. The plant
0:15
produces specialized structures that
0:17
allow it to multiply vegetatively. These
0:20
natural structures include bulbs in
0:22
onions and garlic, ryomes in ginger and
0:24
iris, tubers in potatoes, and runners or
0:27
stolins and strawberries.
0:30
Artificial vegetative propagation
0:32
requires human assistance. Various
0:34
techniques are used to create new plants
0:37
that maintain the genetic identity of
0:39
the parent plant. The four main
0:41
artificial methods include cutting,
0:43
which involves removing and rooting a
0:45
portion of stem, leaf, or root. Grafting
0:48
joins parts from two plants so they grow
0:51
as one, combining their desirable
0:53
traits. Layering involves rooting a stem
0:55
while it's still attached to the parent
0:57
before separating it.
1:00
And tissue culture grows plants from
1:02
small tissue pieces in sterile
1:03
laboratory conditions.
1:08
Let's compare the key differences
1:09
between natural and artificial
1:11
propagation methods. While natural
1:14
propagation requires no human
1:15
involvement, artificial methods are
1:17
human assisted. Natural methods are
1:20
often slower while artificial methods
1:22
are typically faster and provide a
1:24
higher degree of control and efficiency.
1:29
Bulbs are one of the most efficient
1:31
structures for natural vegetative
1:34
propagation in plants.
1:36
The structure of a bulb is specialized
1:38
for both survival and reproduction. It
1:41
consists of a short stem with fleshy
1:43
scales containing stored nutrients. At
1:46
the base of the bulb is the basil plate
1:48
from which roots emerge while a grows
1:50
from the center to form the new plant.
1:54
Let's look at some common examples of
1:56
plants that use bulbs for propagation.
1:58
Onions have concentric layers of fleshy
2:01
scales. Tulips have overlapping that
2:04
store nutrients for the developing
2:06
flower. Liies have scales arranged like
2:09
roof tiles allowing for efficient
2:11
nutrient storage.
2:14
Bulbs reproduce asexually through the
2:16
formation of daughter bulbs, also called
2:19
bulblelets. As the parent bulb grows, it
2:21
produces smaller daughter bulbs around
2:23
its base. These develop into new plants
2:26
that are genetically identical to the
2:28
parent.
2:30
Let's summarize the key points about
2:32
bulbs as natural propagation structures.
2:35
Bulbs have fleshy scales that store
2:37
nutrients for new growth. The basil
2:39
plate is where roots and daughter bulbs
2:41
form. Common examples include onions,
2:44
tulips, and liies. Daughter bulbs are
2:46
genetically identical to the parent.
2:49
This provides reliable asexual
2:51
reproduction for the plant.
3:03
Ryomes are specialized underground stems
3:05
that plants use for vegetative
3:07
propagation. These structures are
3:09
specialized stem adaptations that store
3:11
nutrients and allow plants to reproduce
3:14
asexually.
3:16
Cors are compressed underground stems
3:18
with a swollen base. Plants like
3:20
gladiololis and crocus form cors. A corn
3:23
has distinct nodes, inter nodes, and is
3:26
covered with dry scale-like leaves. New
3:28
corns develop on top of old ones which
3:30
shrivel as they transfer nutrients. When
3:32
a corn reproduces, a new corn forms on
3:35
top of the old one and eventually sends
3:37
up new shoots.
3:39
Tubers are enlarged portions of
3:41
underground stems that store food in the
3:44
form of starch. The potato is probably
3:46
the most well-known tuber. Tubers have
3:48
buds called eyes that can develop into
3:51
new plants. Unlike corns, tubers don't
3:54
have protective coverings and are
3:56
connected to the parent plant by
3:57
stolons. When a tuber like a potato
4:00
begins to grow, shoots emerge from the
4:02
eyes and develop into new plants.
4:05
Ryomes are horizontally growing
4:07
underground stems that run parallel to
4:09
the ground surface. Common examples
4:11
include ginger, iris, and bamboo. Ryomes
4:15
grow horizontally beneath the soil
4:16
surface and have distinct nodes and
4:18
interdes.
4:20
New plants emerge from buds at the
4:22
nodes, allowing ryomous plants to spread
4:24
rapidly and sometimes invasively. Ryomes
4:28
continue to grow and extend
4:29
horizontally, sending up new shoots at
4:32
regular intervals, which creates a
4:34
colony of genetically identical plants.
4:38
Let's compare these three underground
4:39
storage structures and how they differ
4:41
in growth pattern and propagation
4:43
method.
4:45
Corsing
4:47
on top of old ones. Tubers are enlarged
4:50
stem tips with eyes that develop into
4:52
new plants. Ryomes grow horizontally
4:55
with nodes producing new shoots. These
4:57
specialized underground stems are
4:59
crucial for both natural propagation in
5:01
the wild and agricultural reproduction
5:04
of many important crops and ornamental
5:06
plants.
5:09
Stolins and runners are specialized
5:11
stems with unique growth habits. Stolins
5:13
and runners are specialized stems that
5:15
grow horizontally above the ground.
5:17
Unlike ryomes, they don't grow
5:19
underground. These stems extend outward
5:22
from the parent plant and form new
5:24
plants at their nodes or tips.
5:27
Common examples of plants that propagate
5:29
through stolins and runners include
5:31
strawberries, spider plants, and mint
5:34
species.
5:37
The formation of daughter plants follows
5:39
a specific process. First, a node on the
5:42
runner develops buds and small leaves.
5:45
Next, adventitious roots begin to form
5:47
at the node. These roots then anchor
5:49
into the soil and begin absorbing water
5:51
and nutrients. Finally, the new plant
5:54
becomes established and can grow
5:56
independently even if the connection to
5:58
the parent plant is severed.
6:01
To summarize, stolins and runners are
6:04
efficient natural propagation methods
6:05
that allow plants to reproduce
6:07
vegetatively and spread rapidly. They
6:10
produce genetically identical plants or
6:12
clones of the parent plant, ensuring
6:15
successful adaptation to the
6:17
environment.
6:18
Epilus buds are a fascinating adaptation
6:21
where plants develop baby plants
6:23
directly on their leaves. These
6:25
specialized buds form directly on leaf
6:28
surfaces, allowing these plants to
6:29
reproduce asexually without requiring
6:32
flowers or seeds.
6:35
Several plant species have evolved this
6:37
ability. Bryophilm also known as the
6:39
life plant produces plantlets along leaf
6:41
margins. Beonia forms buds and leaf
6:44
veins when damaged and kencho develops
6:47
plantlets between leaf notches.
6:50
The development of these plantlets
6:51
follows a remarkable process. It begins
6:54
with small buds forming on the leaf
6:56
surface. These buds develop into tiny
6:59
leaves. Next, aerial roots begin to form
7:02
reaching toward the soil. Finally, the
7:05
plantlet becomes a complete miniature
7:06
plant ready for separation.
7:09
To propagate plants using these leaf
7:11
plantlets, wait until they have
7:13
developed several leaves and visible
7:15
roots. Then, gently remove the plantlet
7:18
from the parent leaf. Place it in moist
7:21
soil or water to establish the root
7:23
system. Finally, keep the soil
7:25
consistently moist until growth is
7:27
established. The success rate for this
7:29
propagation method is nearly 100% when
7:33
plantlets are properly cared for, making
7:35
it one of the most reliable forms of
7:37
vegetative propagation. Epiphylus buds
7:40
represent one of nature's most elegant
7:42
solutions for vegetative reproduction,
7:44
allowing these specialized plants to
7:46
propagate without seeds.
7:50
Cutting is one of the most widely used
7:52
methods of artificial plant propagation.
7:55
This technique involves removing a
7:57
portion of a plant and encouraging it to
7:59
form roots and develop into a new plant.
8:03
The cutting process starts with
8:05
selecting a healthy section from the
8:06
mother plant. Using clean, sharp tools,
8:10
a section is cut from the plant,
8:12
typically below a node where new roots
8:14
can develop. With proper care and
8:16
conditions, the cutting will develop
8:17
roots and grow into a new plant that is
8:20
genetically identical to the parent.
8:24
Let's look at the step-by-step process
8:25
of taking a cutting.
8:29
First, select healthy plant material.
8:31
Choose disease-free stems, leaves, or
8:33
roots depending on the plant species.
8:36
Next, cut below a node using clean,
8:38
sharp scissors or pruners to minimize
8:40
damage. Remove lower leaves to reduce
8:42
water loss and prevent rotting when the
8:45
cutting is planted. Optionally, apply
8:47
rooting hormone to the cut end to
8:49
stimulate root development. Plant the
8:51
cutting in a suitable growing medium
8:53
that provides good drainage and
8:55
irerration.
8:57
Finally, maintain high humidity and
8:59
indirect light until roots develop,
9:01
which typically takes 2 to 6 weeks.
9:05
There are three main types of cutings
9:07
used in plant propagation, each suited
9:09
for different plant species. Stem
9:11
cutings are the most common type. They
9:13
include nodes with buds that will
9:15
develop into new growth. Leaf cutings
9:17
work well for plants with fleshy leaves
9:19
like snake plants and beonas.
9:22
Root cutings are used for plants that
9:24
naturally produce suckers from their
9:26
root systems.
9:28
Cutting propagation offers several
9:30
important benefits for gardeners and
9:32
plantreeders.
9:34
Cutings produce plants that are
9:35
genetically identical to the parent,
9:37
ensuring consistent traits. They develop
9:40
much faster than growing from seeds,
9:43
often producing mature plants in a
9:44
single growing season.
9:46
Unlike grafting, cutings don't require
9:48
specialized skills and can be done by
9:50
beginners. For many species, cutings
9:53
have a high success rate when proper
9:55
techniques are followed.
10:06
maturity and type of plant material
10:08
used.
10:11
Softwood cutings come from new spring
10:13
growth that's still flexible. They're
10:15
easily wounded and require high humidity
10:17
but root quickly. These cutings are best
10:20
taken in late spring to early summer.
10:23
Plants well suited for softwood cutings
10:24
include aelia, gardinia, hydrangea,
10:27
rodendron, rose, and forthia. Softwood
10:30
cutings are characterized by their green
10:32
flexible stems that snap when bent
10:34
sharply.
10:36
Semi-h hardwood cutings come from
10:38
partially mature current season's
10:40
growth. They're firmer than softwood,
10:43
but not fully woody yet, making them
10:45
more resistant to wilting. These cutings
10:48
are typically taken in late summer to
10:50
early fall. Plants well suited for
10:52
semi-h hardwood cutings include
10:53
chamellia, holly, magnolia, boxwood,
10:56
juniper, and u. Semi-h hardwood cutings
10:59
have begun to mature with stiffer stems
11:01
that bend but don't break easily.
11:04
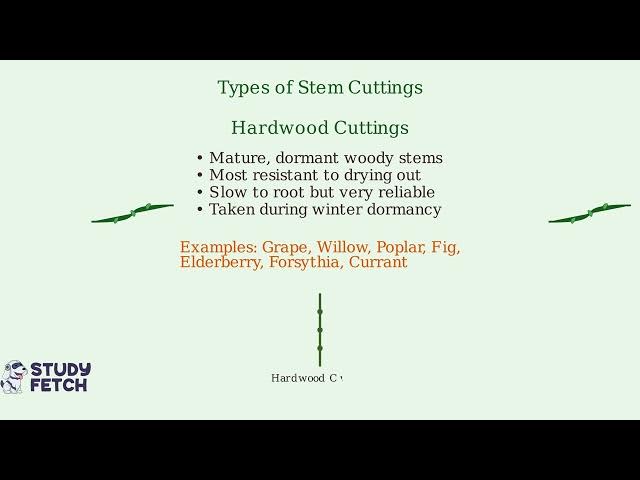
Hardwood cutings come from mature
11:06
dormant woody stems. They're the most
11:09
resistant to drying out. Though slow to
11:11
root, they're very reliable. These
11:14
cutings are taken during winter
11:15
dormcancy. Plants well suited for
11:17
hardwood cutings include grape, willow,
11:19
popppler, fig, elderberry, forthia, and
11:22
currant. Hardwood cutings are fully
11:24
mature and woody, often with visible
11:27
buds along the stem.
11:29
Herbaceous cutings are taken from
11:31
non-woody plants with soft succulent
11:33
tissue throughout. They root quickly but
11:36
are extremely vulnerable to wilting.
11:39
These cutings can be taken throughout
11:41
the growing season. Plants well suited
11:43
for herbaceous cutings include kolus,
11:45
geranium, beonia, impatience,
11:47
chrysanthemum, and basil. Herbaceous
11:50
cutings are completely soft and pliable
11:52
with no woody parts.
11:55
When propagating plants through stem
11:56
cutings, it's important to match the
11:58
cutting type to the plant species.
12:00
Consider the season and plant growth
12:02
stage, adjust care based on cutting
12:05
maturity, and provide appropriate
12:07
humidity levels. By selecting the
12:09
appropriate cutting type for each plant,
12:11
you can greatly improve your propagation
12:13
success rate.
12:15
Leaf cutings and root cutings are
12:17
specialized propagation methods that
12:19
expand our ability to multiply plants
12:22
vegetatively. Leaf cutings are a
12:24
fascinating method where we use just the
12:26
leaf tissue to generate new roots and
12:28
shoots leading to complete plants.
12:32
Several plants are commonly propagated
12:34
using leaf cutings. African violets
12:37
require a whole leaf with its pedole.
12:39
Snake plants can be propagated from
12:41
vertical leaf segments. And many
12:44
succulents readily grow from individual
12:46
leaves or leaf pads.
12:50
The process for successful leaf cutings
12:52
follows several key steps. First, select
12:55
healthy, mature leaves. Make clean cuts
12:58
with sterilized tools. For succulents,
13:00
allow the cut surface to callous before
13:02
planting. Place cutings in well-
13:04
draining growing medium. Finally,
13:06
maintain humidity with a loose covering
13:08
until new growth appears.
13:12
Now, let's transition to root cutings.
13:14
Another specialized propagation method.
13:17
Root cutings use sections of healthy
13:19
roots to generate new shoots and
13:21
complete plants. This method works
13:23
particularly well for plants with
13:25
naturally thick or fleshy roots.
13:30
Several plants respond well to root
13:31
cutting propagation. Blackberries can be
13:34
propagated from thicker roots about a/4
13:36
in in diameter. Flocks propagates well
13:39
from young fleshy roots and horseradish
13:42
is commonly propagated using straight
13:44
pencil-ized root sections.
13:48
The process for root cutings has its own
13:50
specific steps. Begin by carefully
13:53
digging to expose roots during the
13:55
dormant season. Select roots that are
13:57
about pencil thickness and cut them into
14:00
two to 6 in sections. Make clean,
14:02
straight cuts and note which end was
14:04
closest to the crown or top of the
14:06
plant. Plant cutings either horizontally
14:09
or vertically with the top end up.
14:11
Finally, cover with 1 to 2 in of soil
14:14
and keep consistently moist until new
14:16
growth emerges.
14:19
Keep these keys to success in mind.
14:21
Timing is important. Take leaf cutings
14:23
in spring or summer and root cutings
14:26
during winter dormcy. Always use clean
14:28
tools to prevent disease transmission.
14:31
And be patient as some cutings may take
14:33
weeks to develop new growth.
14:39
Introduction to grafting.
14:42
Grafting is a horicultural technique
14:44
where parts from two different plants
14:46
are joined together so they grow as a
14:48
single plant.
14:50
In grafting, the upper part is called
14:52
the scion. This is the part chosen for
14:55
its desirable stems, leaves, flowers or
14:57
fruits. The lower part is called the
14:59
rootstock. It's selected for its strong
15:02
root system, disease resistance, and
15:04
adaptability to soil conditions. The
15:07
point where these two parts join is
15:09
called the graft union which eventually
15:11
heals and forms a permanent connection.
15:15
But why do horiculturists use grafting?
15:18
There are several important reasons.
15:20
First, grafting allows us to combine
15:22
desirable traits from different plants.
15:24
For example, we can join a fruit tree
15:26
known for excellent taste with a
15:28
roottock that has disease resistance.
15:32
Second, grafting helps propagate plants
15:34
that don't root well from cutings. Many
15:37
ornamental and fruit trees fall into
15:38
this category. Third, grafting can
15:41
repair damaged plants. When a valuable
15:43
plant has damaged roots or trunk, bridge
15:45
grafting or repair grafting can save it.
15:49
A practical example is found in apple
15:51
trees. Commercial growers graft
15:53
desirable varieties like honey crisp or
15:55
gala onto specially developed
15:57
rootstocks.
15:59
These rootstocks provide disease
16:00
resistance and control the final size of
16:02
the tree. In the next section, we'll
16:05
explore specific grafting methods,
16:07
including whip grafting and cleft
16:09
grafting techniques. Whip and cleft
16:11
grafting are two essential techniques
16:13
used to join different plant materials
16:15
together. Whip grafting joins similar
16:18
size stems while cleft grafting inserts
16:20
a smaller cyan into a larger roottock.
16:27
Let's examine whip grafting, also known
16:29
as splice grafting. Whip grafting
16:31
requires a roottock and scan of similar
16:33
diameter. First, make matching diagonal
16:36
cuts of about 45° through each stem.
16:39
These angled cuts create maximum cambium
16:42
contact when joined together. For better
16:44
stability, make a second downward cut in
16:46
each piece to create interlocking
16:48
tongues. The cyan and rootstock are then
16:51
fitted together, aligning the cambium
16:53
layers on at least one side. The graft
16:56
union is secured with grafting tape
16:58
wrapped firmly but not too tightly and
17:00
sealed with grafting wax to prevent
17:02
drying.
17:07
Now let's look at cleft grafting which
17:09
is used when the rootstock is
17:10
significantly larger than the scan. In
17:13
cleft grafting the rootstock is
17:15
typically much larger in diameter than
17:17
the scan. First, cut the rootstock
17:19
straight across, creating a flat
17:21
surface. Next, split the rootstock down
17:23
the center with a clean vertical cut.
17:26
The scion is prepared by cutting it into
17:28
a wedge shape with two flat surfaces.
17:31
These cuts should be smooth and straight
17:33
to ensure good contact with the
17:34
rootstock. The scion is then inserted
17:37
into the split in the rootstock, making
17:39
sure the cambium layers align on at
17:41
least one side. Finally, secure the
17:43
graft with grafting tape and seal all
17:46
cut surfaces with grafting wax to
17:48
prevent moisture loss and infection.
17:51
For successful grafting, remember these
17:53
key points. Use sharp, clean tools to
17:56
make smooth cuts. Ensure the cambium
17:58
layers make contact. Work quickly to
18:01
prevent tissue drying. Seal all cut
18:03
surfaces thoroughly and reduce the scan
18:06
to just two or three buds.
18:08
Bark grafting is a technique where
18:10
scions are inserted between the bark and
18:12
wood of the rootstock. It's particularly
18:14
useful for grafting onto larger diameter
18:17
stems or trunks. The process begins with
18:20
a straight cut across the rootstock,
18:22
creating a flat surface.
18:24
Next, make a vertical slit in the bark,
18:27
cutting through to the wood. This
18:28
creates a space to insert the scion.
18:31
Prepare the scion by making a long
18:33
sloping cut on one side, creating a
18:35
wedge shape. Insert the scion between
18:37
the bark and wood of the rootstock with
18:39
the cut surface facing inward against
18:42
the wood. Finally, secure the graft with
18:45
grafting tape and apply grafting wax to
18:47
prevent moisture loss and protect the
18:49
union. Bark grafting offers several
18:52
benefits. It works well on thick bked
18:54
trees, allows for multiple scions to be
18:57
inserted around the rootstock, and
18:59
generally has a high success rate. Now,
19:01
let's explore bridge grafting, which
19:03
serves as a repair technique for damaged
19:05
trees. Bridge grafting is a specialized
19:08
technique used to save trees that have
19:10
suffered bark damage around their
19:12
trunks. The technique creates bridges of
19:15
scion wood that span the damaged area,
19:18
reconnecting the flow of nutrients
19:20
between roots and canopy. First, clean
19:22
the damaged area to remove dead or
19:24
diseased tissue, creating a clean
19:26
surface for the bridge grafts. Prepare
19:28
multiple scion sticks that are long
19:30
enough to span the damaged area with
19:33
additional length for insertion points.
19:35
Make small cuts in the healthy bark
19:37
above and below the damaged area. These
19:40
cuts allow the scans to be inserted
19:42
under the bark. Insert the scans to
19:44
bridge the damaged area. The ends of
19:46
each scan should slip under the bark at
19:49
both the top and bottom of the damaged
19:51
section. Secure the graphs with grafting
19:53
tape at both insertion points and seal
19:56
all cut surfaces with grafting wax to
19:58
prevent moisture loss and protect
20:00
against infection. Bridge grafting is
20:02
particularly useful for repairing damage
20:04
caused by animals, frost, equipment
20:07
injuries, or disease. This technique can
20:10
save valuable trees that might otherwise
20:12
be lost. Let's review some key care
20:14
guidelines for ensuring successful bark
20:16
and bridge grafts. Proper care is
20:19
essential for graft success. A
20:21
successful graft will show new growth
20:23
from the scan, indicating that vascular
20:25
connections have been established.
20:28
Monitor your graphs regularly, keeping
20:30
the area clean and disease-free. Ensure
20:33
adequate moisture without overwatering,
20:35
and remove any competing growth below
20:37
the graft union. As the graft develops,
20:40
you'll see different stages of healing.
20:42
Callus tissue forms within weeks.
20:44
Vascular connections establish in one to
20:47
two months and a strong union develops
20:49
over several months. Both bark grafting
20:52
and bridge grafting are valuable
20:54
techniques that can help save and
20:55
rejuvenate trees. With proper
20:57
preparation, execution, and afterare,
21:00
these methods can extend the life of
21:01
valuable trees for many years.
21:06
Patch budding is a specialized method of
21:08
plant propagation used when precision is
21:10
required. In patch budding, a square
21:13
section of bark containing a bud is
21:15
carefully removed from the budwood or
21:17
cion. A matching square is then cut and
21:20
removed from the rootstock, creating a
21:22
space for the donor patch. The patch
21:24
with the bud is then transferred from
21:26
the budwood to the rootstock, forming a
21:29
perfect fit. The area is then securely
21:31
wrapped with budding tape, leaving only
21:34
the bud exposed. Patch budding is
21:36
characterized by several key points. It
21:39
requires precise square cuts and works
21:41
best for thick barked species like
21:43
walnuts and pecans. It's often used when
21:46
tedding is difficult and should be
21:48
performed during the growing season when
21:50
bark slips easily. Let's explore other
21:53
specialized butdding methods that have
21:55
been developed for specific plant types
21:57
and conditions.
22:01
Ring budding involves removing a
22:03
complete ring of bark with a bud from
22:05
the budwood and placing it on a matching
22:07
ring cut on the rootstock.
22:10
This method is typically used for thick
22:12
bked trees like pecans and walnuts and
22:14
has higher success rates in humid
22:16
climates. Ibudding features a single
22:19
vertical cut in the roottock where the
22:22
bud is inserted under the raised bark
22:24
flaps. This method is commonly used for
22:26
young citrus trees and is best performed
22:29
in spring when growth is most active.
22:32
Let's compare when each budding method
22:34
is most appropriate based on plant type
22:36
and season. This comparison shows when
22:39
each specialized butdding method works
22:41
best. Patch budding is ideal for walnuts
22:44
and pecans in summer, ring butdding for
22:46
nut trees in spring, and eyebutting for
22:49
citrus trees in spring. The choice of
22:51
budding method depends on the plant
22:53
species, bark thickness, and
22:55
environmental conditions. Specialized
22:58
techniques allow propagators to achieve
23:00
higher success rates with different
23:02
plant types.
23:05
Welcome to our lesson on plant
23:07
propagation by layering. Layering is a
23:09
gentle propagation method where roots
23:11
are encouraged to form on a stem while
23:14
it remains attached to the parent plant.
23:17
In this method, we bend a branch or stem
23:19
to the ground and cover a portion of it
23:21
with soil while keeping it attached to
23:24
the parent plant. Roots begin to form
23:26
where the stem contacts the soil while
23:29
the branch continues to receive water
23:31
and nutrients from the parent plant.
23:34
Layering offers several key advantages.
23:38
The new plant receives continuous water
23:40
and nutrients from the parent until it
23:42
establishes its own root system. This
23:44
results in a higher success rate
23:45
compared to cutings and requires no
23:48
specialized equipment to perform.
23:50
Layering is particularly useful for
23:52
plants that are difficult to root from
23:54
cutings. This includes many woody
23:57
ornamentals like roodendrrons and aelas.
24:00
It's also effective for many climbing
24:02
vines such as clatus and wisteria which
24:05
can be challenging to propagate through
24:06
other methods.
24:08
Now that we understand what layering is,
24:10
let's briefly look at the different
24:12
types of layering techniques available
24:14
to gardeners.
24:16
There are several techniques used in
24:18
layering propagation. These include
24:20
simple layering, tip layering, air
24:22
layering, and trench and mound layering.
24:25
Each of these methods is suited to
24:27
different types of plants and growing
24:29
situations, which we'll explore in the
24:31
following sections.
24:33
Now that we understand the basics of
24:35
layering, we're ready to explore each
24:37
technique in more detail. Simple and tip
24:40
layering are propagation methods where
24:42
new plants form while still attached to
24:45
the parent. In simple layering, a
24:47
flexible stem is bent to the ground and
24:50
partially buried while still attached to
24:52
the parent plant. The buried portion of
24:54
the stem develops roots while the tip
24:57
remains above ground and continues to
24:59
grow. The process of simple layering
25:01
involves several key steps.
25:04
Tip layering is similar, but only
25:06
involves burying the tip of an arching
25:08
stem. The buried tip forms roots and new
25:11
shoots, creating a new plant while still
25:13
connected to the parent.
25:16
Several plants naturally propagate
25:18
through tip layering, including bramble
25:20
fruits like blackberries and
25:22
raspberries.
25:24
While these methods occur naturally,
25:26
gardeners can enhance the process to
25:28
improve success rates.
25:30
Techniques like wounding the stem,
25:32
applying rooting hormone, and
25:34
maintaining proper moisture
25:36
significantly increase rooting success.
25:40
Once roots have established, which
25:41
typically takes several weeks to months
25:43
depending on the species, the new plant
25:45
can be separated from the parent. In
25:48
propagation, trench and mound layering
25:51
are specialized methods that work well
25:53
for specific plant types. Trench
25:55
layering involves laying a flexible
25:57
branch into a prepared trench in the
25:59
soil. A branch is carefully positioned
26:01
in the trench with only its tip exposed
26:04
above the soil. Over time, roots form at
26:07
multiple points along the buried stem,
26:09
creating several new plants from one
26:11
branch. This method works particularly
26:14
well for plants with flexible stems like
26:16
blackberries, raspberries, forcyia, and
26:18
honeysuckle. Now, let's explore another
26:21
effective layering technique called
26:23
mound layering. Mound layering, also
26:25
called stooling, starts with a plant
26:27
that has been pruned back to near ground
26:29
level. Soil is mounded around the base
26:32
of the plant and new shoots grow up
26:34
through this mound. As the shoots grow,
26:36
they develop roots in the mounded soil.
26:39
Each rooted chute can be separated to
26:41
form a new plant. Mound layering is
26:43
particularly effective for woody plants
26:45
like apple rootstocks, gooseberries,
26:47
currants, and quints. Let's summarize
26:50
what we've learned about trench and
26:52
mound layering techniques. Both trench
26:54
and mound layering allow for propagating
26:57
multiple plants from a single parent
26:59
with minimal equipment. Trench layering
27:02
works best for plants with flexible
27:03
stems, while mound layering is ideal for
27:06
woody plants that sprout easily from the
27:08
base.
27:12
Tissue culture is an advanced laboratory
27:14
technique for plant propagation. In
27:17
tissue culture, small pieces of plant
27:19
tissue are grown in sterile laboratory
27:21
conditions. The environment must be
27:23
completely sterile with a specialized
27:25
growth medium containing nutrients and
27:28
plant hormones.
27:30
The micropagation process begins with
27:32
carefully selecting plant material and
27:34
sterilizing it. The sterile tissue is
27:37
then transferred to a growth medium
27:39
where it develops new shoots. Finally,
27:42
root development occurs and the
27:44
plantlets must be carefully acclimated
27:46
to the outside environment.
27:49
Tissue culture offers several
27:51
significant advantages. First, it
27:53
enables rapid multiplication, producing
27:55
thousands of plants from a single piece
27:58
of tissue. Second, it produces
28:00
disease-free plants since the sterile
28:02
conditions prevent the transmission of
28:04
pathogens. Third, tissue culture is
28:07
invaluable for conservation efforts,
28:09
preserving rare and endangered plant
28:11
species. Tissue culture is also widely
28:14
used in crop improvement programs,
28:16
production of valuable plant compounds,
28:18
and virus elimination from infected
28:20
plants. Tissue culture and micropagation
28:24
continue to evolve, offering
28:25
increasingly efficient methods for plant
28:28
multiplication. Commercial applications
28:30
of vegetative propagation.
28:32
Vegetative propagation forms the
28:34
backbone of a multibillion dollar global
28:37
industry. It enables consistent mass
28:39
production of plants and drives
28:41
commercial success in horiculture,
28:43
agriculture and forestry sectors.
28:47
In the horicultural industry, vegetative
28:49
propagation ensures genetic uniformity
28:51
in ornamental plants. Commercial
28:54
nurseries and mass production facilities
28:56
produce millions of identical plants
28:58
annually, preserving desirable traits
29:00
for market consistency.
29:03
In agriculture, vegetative propagation
29:05
maintains fruit quality and yield
29:07
consistency. It enables rapid
29:09
multiplication of disease-free stock and
29:12
is critical for crops like bananas,
29:14
grapes, and potatoes that rarely produce
29:16
viable seeds or don't breed true from
29:18
seed.
29:20
In forestry, vegetative propagation
29:23
allows cloning of superior trees for
29:25
timber production. This accelerates
29:27
reforestation with elite specimens and
29:29
preserves valuable genetic resources.
29:32
Commercial plantations can establish
29:34
uniform stands with predictable growth
29:36
rates and wood quality.
29:39
Commercial propagation has evolved with
29:41
advanced technologies. Automated systems
29:44
can process thousands of cutings per
29:46
hour, while tissue culture enables mass
29:49
cloning in sterile conditions. These
29:52
advanced facilities operate yearround at
29:54
industrial scale, producing millions of
29:57
plants for global markets.
30:03
The global market for vegetatively
30:05
propagated plants exceeds $30 billion
30:07
annually and continues to grow. As
30:11
population increases, drive demand for
30:13
more efficient food production and as
30:16
technology improves propagation
30:17
efficiency. This market segment will
30:19
become increasingly important to global
30:22
agriculture and horiculture.
30:26
Home gardening applications of
30:27
vegetative propagation can transform
30:30
your garden without breaking the bank.
30:32
For successful propagation at home,
30:34
you'll need a few basic tools. Clean
30:37
sharp scissors or pruning shears, small
30:39
pots with drainage, well- draining
30:41
potting soil, clear plastic for
30:43
humidity, and optionally rooting hormone
30:46
to increase success rates. Some plants
30:48
are much easier to propagate than
30:50
others. For beginners, try house plants
30:52
like paos, spider plants, African
30:55
violets, and snake plants. In your
30:57
garden, herbs like mint and rosemary,
31:00
succulents, geraniums, and hydrangeas
31:02
are excellent choices for first
31:04
attempts. The stem cutting method is one
31:06
of the simplest propagation techniques.
31:08
First, cut a 4 to 6 in section below a
31:11
leaf node. Then, remove lower leaves,
31:14
keeping two or three at the top.
31:16
Optionally, dip the cut end in rooting
31:18
hormone to improve success. Plant the
31:20
cutting in moist potting mix about 1 to
31:23
2 in deep. Cover with clear plastic to
31:26
maintain humidity and place in bright
31:28
indirect light. Water propagation is
31:30
even simpler for many plants. Take a
31:33
cutting. Place it in a clear container
31:34
of water, ensuring the nodes are
31:36
submerged. Change the water every few
31:39
days to prevent bacteria. When roots
31:41
reach 1 to 2 in long, transfer the
31:43
cutting to soil. For succulents, leaf
31:46
propagation is often the easiest method.
31:49
Gently twist a healthy leaf from the
31:51
plant, ensuring a clean break. Let the
31:53
leaf callus over for 1 to two days. Then
31:57
lay it on top of well- draining soil.
31:59
Mist occasionally, but avoid
32:00
overwatering. Within a few weeks, roots
32:03
and a tiny new plant will form at the
32:05
base of the leaf. Once established, pot
32:08
up the new plantlet. To increase your
32:09
chances of success, start with easy,
32:12
fast growing plants. Always use clean
32:15
tools to prevent disease transmission.
32:17
Maintain consistent moisture levels and
32:19
humidity around new cutings. Be patient
32:22
as roots take time to develop. It's wise
32:25
to propagate more cutings than you need
32:27
since not all will succeed. And keep
32:29
your cutings in bright light, but avoid
32:31
harsh direct sunlight that can stress
32:33
new growth.
32:36
As we look to the future, vegetative
32:38
propagation continues to evolve with
32:40
emerging technologies and innovative
32:42
research.
32:44
Emerging technologies are
32:46
revolutionizing vegetative propagation.
32:48
Advanced bioreactors now enable mass
32:51
production of plant tissue cultures
32:53
while crisper gene editing allows
32:55
precise trait improvement. Artificial
32:57
intelligence is optimizing growth
32:59
conditions and automation systems are
33:02
reducing labor costs while improving
33:04
consistency in commercial propagation
33:07
facilities. These technological advances
33:09
are transforming both laboratory and
33:11
commercial propagation methods.
33:14
Genetic preservation has become a
33:15
critical application of vegetative
33:17
propagation. Using cryopreservation
33:20
techniques, scientists can store tissue
33:22
samples from rare plants indefinitely.
33:25
These methods help maintain agricultural
33:27
biodiversity and secure genetic material
33:30
of endangered species against
33:31
extinction, creating living libraries of
33:34
plant genetics. These preservation
33:36
efforts are particularly important as we
33:39
face biodiversity loss due to habitat
33:41
destruction and climate change.
33:44
Sustainability is driving innovations in
33:46
vegetative propagation. New resource
33:48
efficient systems minimize water and
33:50
nutrient usage while maximizing plant
33:53
yields. Solarp powered growth facilities
33:55
and circular economy approaches are
33:58
reducing the environmental footprint of
34:00
commercial propagation operations.
34:03
These sustainable practices not only
34:05
benefit the environment but also improve
34:07
economic outcomes for growers. As
34:09
climate change intensifies, vegetative
34:12
propagation is helping develop resilient
34:14
plant varieties. Scientists are creating
34:17
droughtresistant and heat tolerant
34:19
cultivars that can thrive in changing
34:21
conditions. These efforts support food
34:23
security in vulnerable regions while
34:26
preserving ecological diversity through
34:28
the propagation of locally adapted plant
34:30
varieties.
34:32
The future of vegetative propagation
34:34
represents a powerful synthesis of
34:36
traditional horicultural knowledge and
34:38
modern science. As we face global
34:41
challenges like climate change and
34:43
biodiversity loss, these evolving
34:45
techniques will play a crucial role in
34:48
preserving our plant heritage and
34:50
securing our agricultural future.
#Biological Sciences
#Ecology & Environment