0:00
Hey viewers, this is E36 Fanatic, Stephen here with another video on my Mercedes Teardown series
0:18
Today I'm taking off a seat, a front power seat on a Mercedes-Benz W210
0:26
In case you all haven't been watching the series, I've just been stripping down this entire car and I show different videos of taking apart stuff and now I'm removing this front seat
0:42
uh it's generally really easy to do uh it's just got four bolts basically and then you got some
0:50
switches to pull out issue is though especially if you're doing what i'm doing and taking apart a car
0:56
you actually need power to your seat really it makes it a whole lot easier if you've got power
1:02
to your seat because you need to move it forward and backward to get the two the four bolts out
1:08
but I removed the battery a lot earlier and a lot of other electrical equipment
1:15
so I'm not going to mess with that. However, this seat is seated pretty well to where I didn't need electricity anyways
1:24
So, first thing you're going to do is you've got two caps in the front, on the front rails
1:31
and so what you basically going to do is take it and just pull on it and it pops right out It just a little plastic plastic cap and inside you got your bolt your two front bolts that are holding this rail down And right and right over here So you going to just remove these two
2:12
bolts and they're a size E12 Torx fit and they're pretty they're torqued a little bit high but they're
2:20
really easy to remove. Okay so once you got these little bolts up out up front and they're just two
2:30
little stubby bolts basically little Torx bolts in the front right here. Once you got those out
2:36
You can see the seat. It's already moving around. And then after that, you've got to come around and remove the two rear ones
2:56
Which are going to be, you've got one right here. Same exact as the other ones, an E12 Torx
3:03
and then one on the other side too. And once you've got these two out
3:11
basically all you have to worry about is the electrical connections underneath
3:20
And also as a note, this is where power would really come in handy
3:26
depending on how the seat is oriented. I got really lucky, and you see right here
3:31
drive access to all four bolts without having to move it But generally it not going to be that way you need acts you need electric electricity to access these four bolts so you just move it all
3:44
the way forward and then all the way to the rear as you're changing these and it
3:48
makes it really easy okay so once you've got these other two bolts out of the
3:54
back it'll be completely loose at this point what what I like to do because you
4:02
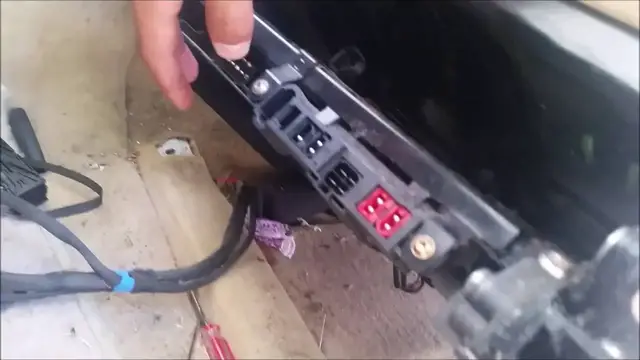
gotta disconnect the connections so I just push it back just push the whole
4:08
thing back and you can see where it's connected to the floor right here you've
4:15
got this main connection right here and you've got a few more here here and here
4:23
that you need to just pull right out also when you're doing this you need to
4:29
go ahead and cut this black tie right here once you've got these connections
4:35
pulled out and then this man one right here. Okay so just a forewarning this
4:41
last connector is a little bit trickier than the other three. I kept looking for
4:47
something to press this out of this area right here and really it was just this
4:54
is the key this plastic right here it'll be sticking out like this you just
4:59
press it in until it clicks and then pull and it comes right out. It's just a little note about
5:07
that because it took me a minute to figure that out. Then once you've got all these wires out and
5:13
everything. Just get them out of the way. And at that point your seat is about completely unattached now if you actually need to remove the
5:33
entire seat you do have one last thing you need to do see this right here is your seat belt you
5:41
got one bolt holding it in usually it's got a plastic cover I don't know what happened to
5:46
this car has it got torn off at some point who cares but the seat belt is of
5:52
course attached so you got to remove if you're removing the whole seat you're
5:57
gonna want to remove that bolt right there which I believe is a 17 millimeter
6:01
okay so yeah this seat belt seat belt bolt right here it's just a 17 millimeter
6:08
and so once you got it out once you got it out the whole thing just pops right out and you can pull it out it's pretty
6:34
the seats pretty heavy though and then if you need to work on anything with
6:39
replacing some of the seat motors or or anything concerning that they are or the
6:46
gearboxes they're right under here okay so once you got the seat out it's open
6:55
to do whatever you really need to do on it whether it be one of these three
7:00
motors needs replacing, a gearbox isn't working, or the control module isn't working. It's
7:07
all right here. I hope you all enjoyed this video. If you did, please like, comment, and
7:13
subscribe. Thank you very much, and y'all have a good one