Up next in 10


A video on removing one of the three control module/computers in the front of the Mercedes W210.
Show More Show Less View Video Transcript
0:00
Hey viewers, this is E36 Fanatics, Stephen here
0:13
Today I'm going to show you how to pull out the ECU, the main computer, out of your Mercedes-Benz W210
0:23
This specific car is an E430-2000, but it's pretty standard among all the W210s and among a few other models too
0:33
So the computer, and ignore the fact that the car is pretty taken apart at this point
0:41
I've been taking apart the car for a while. So the actual computer is right here under this plastic in the passenger side firewall
0:52
and it's pretty easy actually to remove. Now, first thing you're going to want to do, of course
0:59
before you start actually messing with the computer, you're going to want to go ahead and disconnect the battery
1:07
and let it sit for, you know, 15, 20 minutes just to let the system get the electricity out You don want to mess with the computer when there still electricity running through it So once you do that you got a couple four four
1:27
Phillips head screws that are holding this plastic actually on the top of the computer
1:33
Then once you get that out, the whole thing just comes out
1:45
Then at this point, you can see all your relays, and you've got a couple fuses here
1:51
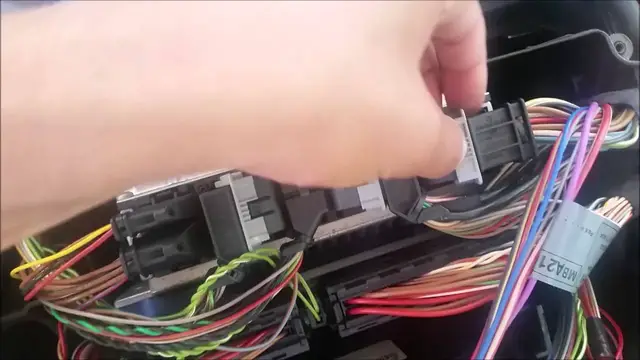
But here's what we're actually looking for. This is the actual control module ECU computer
1:57
and to actually remove this you've got a few fuses right or a few connections that you got
2:07
to pull out first so I'm going to go ahead and do that. Now as you're pulling these relays out
2:15
you should quickly realize that you've got to actually do this in a certain order you can't
2:20
remove them in a straight row. So the first one you got to do because these plastic tabs
2:27
they can't go all the way down unless you remove these little black ones first, which you just
2:33
press the plastic tab on the side on these Then you can remove this one then you can remove
2:45
Then you can remove this one, then you can remove this one. And this one right here just
2:50
has one plastic tab here and one here that you need to pull out to pull these two out
2:57
Okay, so now what you've got to do to get this computer out is you have two Torx bolts down here, that one right there, and then one a little bit further down there
3:19
Now you don't have much room to actually get a socket down there
3:27
So what I did is I just took a little Allen wrench
3:32
This is a T27. Doesn't fit perfectly, but I think it's a T30, but I didn't have one sitting around
3:38
So I just used a T27. It's not torqued very high at all. It's hooked up to plastic, I believe, behind this
3:45
so I just take it and turn it out and it's pretty tedious you got to turn it
3:52
a lot but I guess the job done okay so these bolts are in fact t30s I was using t27 because there no torque on them really but you can use either now i this is a part out car that i doing and i don really care about
4:10
tearing up some of the plastic and this bottom bolt right here is very hard to get to i tried to
4:18
use a an allen wrench and it was too short for this and i tried a few different things and it
4:24
wasn't working so I ended up just cutting out the plastic right here but of course if you know this
4:29
is your car you're not going to want to do that and there it goes and once you've once you've got
4:41
those two bolts out, this computer pops right out. And here it is. Pretty easy to get out, really
5:02
You're basically just going to want a really short ratchet to get into here, to get that last bolt
5:08
so you don't have to do what I did. It's pretty easy to get to. Hope you all enjoyed the video
5:15
If you did, please like, comment, and subscribe. Thank you very much, and you all have a good one
#Vehicle Repair & Maintenance
#People & Society
#Vehicle Modification & Tuning