Up next in 10


This simple DIY is an in-depth alternator replacement procedure on a bmw e36. It is a relatively simple and quick job, however it is very important to know as a failed alternator will cause a non-starting car and/or the car to cutoff while driving.
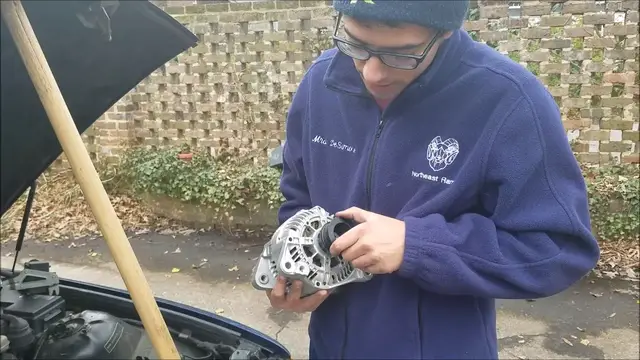
This particular vehicle is a 1995 BMW 318i, the alternator was more than likely original to the car and it has more than 140,000 miles on it.
Typically alternator replacement is needed in two cases, the first is that the regulator inside the alternator has failed and it is sending to little or too much power to the battery. The second reason, is when the bushings fail inside the alternator and cause a horrible squeaking noise, especially at higher rpms.
This alternator was replaced for the second reason, you can hear in the video the whining that the alternator makes at high rpms.
Alternator replacement on an e36 318i should take no more than one hour.
Several common components to check while replacing the alternator is the idler pulley, tensioner assembly, and serpentine belt.
Show More Show Less View Video Transcript
0:00
Hey E36 fanatic, Steven here. Today I'm working on another four-cylinder BMW E36. This is a 1995
0:08
and basically what I've been doing lately is changing a few of the pulleys on this car
0:16
It was having a lot of, the pulleys were making a lot of noise. I still need to replace a tensioner
0:21
pulley but today I'm actually going to replace the alternator and I'll show you why. It's going to
0:28
rev it up. You hear that noise? Now it makes that squeaking kind of bad bearing noise more
0:41
when it's really cold outside. However, he's noticed when he revs up the vehicle a bit
0:48
it makes it quite bad as well then too. So I'd already replaced the water pump before
0:57
and I've replaced this idler pulley right here. It was making some noise
1:02
And so now the rest of the noise seems to be coming from the alternator
1:08
So I'm going to go ahead and replace that as well. And then hopefully we will be done replacing stuff at that point
1:16
Luckily the alternator is really easy to replace on this vehicle. Alternators have gotten really expensive over the years though
1:24
but like I said it's quite an easy replacement. All right so the first thing you got to do to get
1:30
to your alternator you're going to need to go ahead and loosen up on this boot right here
1:35
This you could technically do it from here too and just pull off the mass airflow there but
1:40
the more room the better. So loosen it up on here you got this sensor
1:44
and then you got this one right here. Pull those two off you got two 10 millimeters right here
1:53
remove those okay so next thing you want to go ahead and do is go get the power
1:59
the serpentine belt out of the way here's your tensioner right here just turn it
2:04
now i highly suggest that you make a diagram of the belt i don't do that anymore on these cars
2:14
just because i've been working on these same four-cylinder e36s for years they're all routed
2:20
the same but i would highly suggest doing that next thing you're going to want to do oh man
2:26
so when i spin this alternator you can hear that noise it's making now that noise is about you know
2:34
times 10 times 20 when the thing's actually spinning fast so there's another once you
2:40
actually got it off the belt you can spin it and tell now you have to remove this idler pulley on
2:46
the four-cylinder motors to get to this alternator and this would be a very good
2:52
time to change this idler pulley. However on this car it's brand new so
2:57
there no way I changing a brand new part that I just changed two weeks ago So I just gonna pop it off set it over there when you remove it
3:10
remember you got this metal cap here it's supposed to be placed back like this in this orientation set that there another thing while you're here changing
3:19
if you're changing this alternator take a look at your belt obviously but also
3:26
Also take a look at this tensioner. See how this tensioner is free spinning like that
3:32
Also I noticed when it's moving at high RPMs the tensioner moves a little bit
3:36
It's got a little play. So this is bad. The tensioner and the pulley is bad
3:40
I'm not going to change that right now though because the local auto parts store does not
3:44
have it. So I'm going to worry about the alternator. So next thing you're going to want to go ahead and do, like I said this is a really easy
3:53
job to do. You have two bolts holding in this alternator. One right here and then one down here
4:01
They are 13mm if I recall but somehow I found a standard that works for it too
4:12
Now another thing you're going to want to do is of course you're going to want to cut
4:15
power to your battery because if I recall that hot wires always getting
4:23
juice to this alternator don't hold me to it but if I recall it's always
4:27
getting juice so you're gonna want cut power to the battery before you start
4:33
messing with the wiring in the back All right, there's that second one
5:00
All right, next step is to pull that battery. I recall because I pulled these things before, it's got a big red wire and then a small black
5:08
one and that's it. But you can't really get to it. I don't like to try and get to it while it's still attached here
5:15
I'd rather pull it out of here first and then get to it because it's got a little
5:19
this wire right here has a little bit of a pull. So what I do, take the PB blaster, get it in this area right here
5:31
And you'll understand why I do that here in a minute because it is usually a pain
5:36
to get these things in and out. And the reason being is when you bolt, when you put a bolt through here, it actually, it's got like these two little pistons on the inside of this alternator and the threads
5:50
They actually compress into this bracket right here. So I got my handy dandy
5:58
And look at that, that was pretty easy. I'm happy with that. Let me get the second one up
6:08
And there we go all right next step is to get these two wires out if I recall one of them
6:24
13 and one of them is a 10. That's what I'm betting
6:40
I'll tell you guys, I love working on these four cylinders. Everything's so easy on them for the most part
6:46
all right now here's the alternator it's all screwed up i wonder where this popped off from one of the studs popped out of the casing
7:01
and i had to crack the plastic to even get it get the nut off of the stud
7:07
but you can see these two little stay still you can see this this metal right here actually
7:17
compresses in when you fit in the alternator and put the bolt in and that's what makes it really
7:21
really tight so and there is my old used alternator ready to go all right so i got the new alternator
7:33
from I picked it up from O'Reilly's this thing's gonna cost you about 200 to 230 bucks probably
7:40
might be able to get cheaper offline or if you're like me and got an account with them might be able
7:46
to get cheaper so when you pick it up though there's three options at least for this vehicle
7:50
there were and alternators they put on these E36s you're gonna want the one if you have an idler
7:55
pulley that blocks the way on the alternator you're gonna want to get the one that does that
8:00
It's got a second space for a bolt because one of them doesn't come with these two bolts right here to put two bolts in
8:10
The other thing is, now the reason I'm changing this thing is because the bearings inside are making a horrendous noise
8:17
But there are, of course, your alternator can just go bad like your regulator can go bad
8:23
And then your alternator won't charge your battery. This car has about 140,000-150,000 miles on it
8:30
So sometimes you can actually rebuild these things and change the bearings, but with the
8:36
amount of miles on it, I figured it was best to go ahead and change the whole alternator
8:40
since it was already going bad. So first thing you're going to want to do is get it wired up
8:51
Should be pretty obvious which wires go on which
9:02
Okay, so at this point I'm popping in a new alternator. I don really have to spray the new one but it just makes it even easier So why not Come on There we go
9:32
Okay, so sometimes these things aren't as easy to put in as the new ones
9:37
This is a remanufactured unit. which could make it a little more of a pain
9:45
with nothing we can't handle. All right, so the best way to do this
9:54
is get the bottom stud in first, get the bottom one in first
9:59
and then go with the top one. The top one's easy to get
10:03
It's the bottom one that can be the tough one to do. So I got a bottom one partially threaded in
10:10
And now, go on the top. Tighten those two bolts
10:22
There we go. And I already got these wires in the back. Make sure that cover's on in the back
10:29
Now you've got that idler pulley. If you remember what I told you, just keep it aligned like this and you won't have any trouble
10:37
replace it i would they're pretty cheap i'll just pop that back on
10:56
all right so once you're done with the alternator and everything putting the belt back on i suggest testing it before you put your mass airflow sensor and everything back on
11:05
Don't worry, the car runs just fine without it. Well, I mean, it runs a little rough, but it runs
11:41
Cruise control. Alright, hit it. Hit it. Alright, alright
11:59
Well, as you can hear, the annoying noise is gone. So, we've taken care of that problem
12:07
and got a new alternator on it now. Like I said, very easy job to do and when you're in there you might as well if you got an old belt or some other
12:17
old pulleys replace those i hope you enjoyed this video and it helped out y'all have a good one
#Vehicle Repair & Maintenance